
Importing Virtual Appliance into XenServer & Initial Configuration
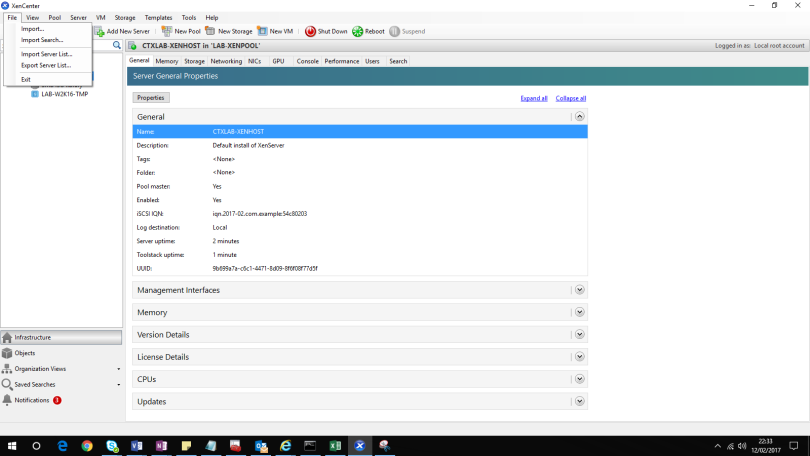
Step 1: Select XenServer in XenCentre (in this case CTXLAB-XENHOST)

Step 2: Select File, Click Import
Step 3: At locate the file you want to import , click browse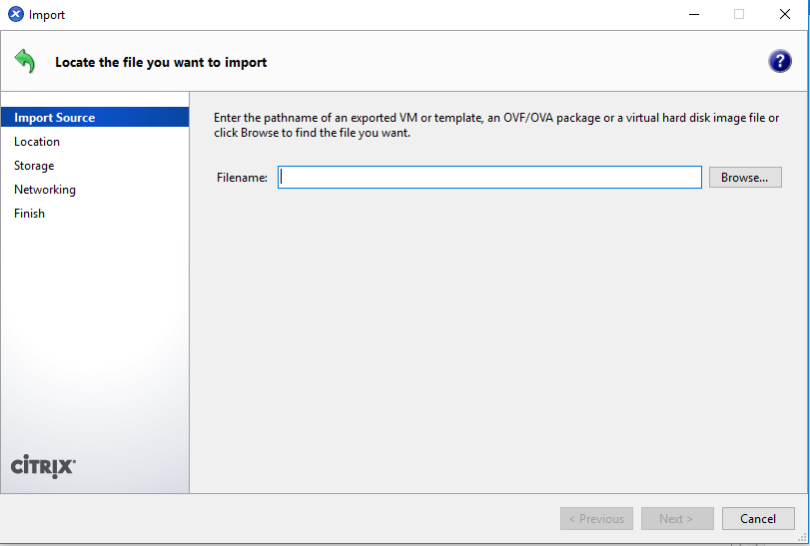
Step 4: Browse for the XVA file (NSVPX-XEN-11.1-51.26_nc), Click OK. This can be downloaded at http://citrix.download.com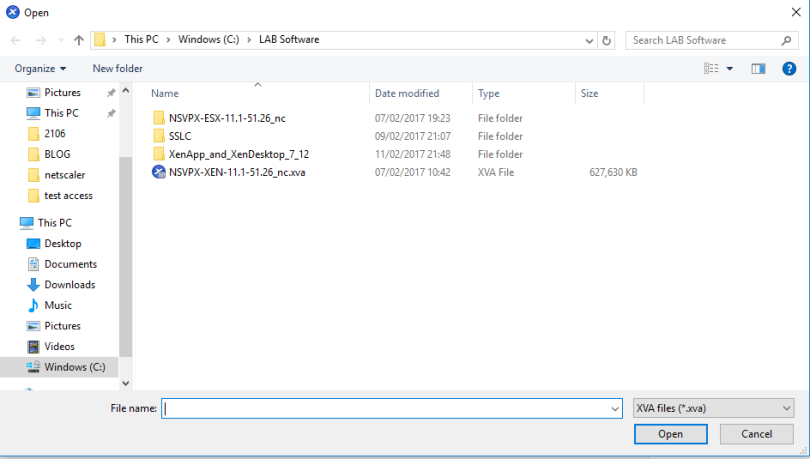
Step 6:Click Next to begin Import 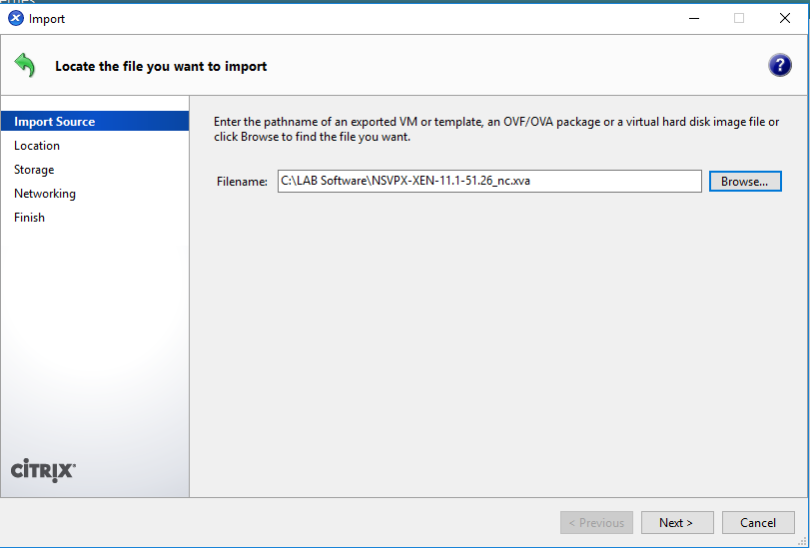
Step 7: Select Home Server , in this case CTXLAB-XENHOST. Click next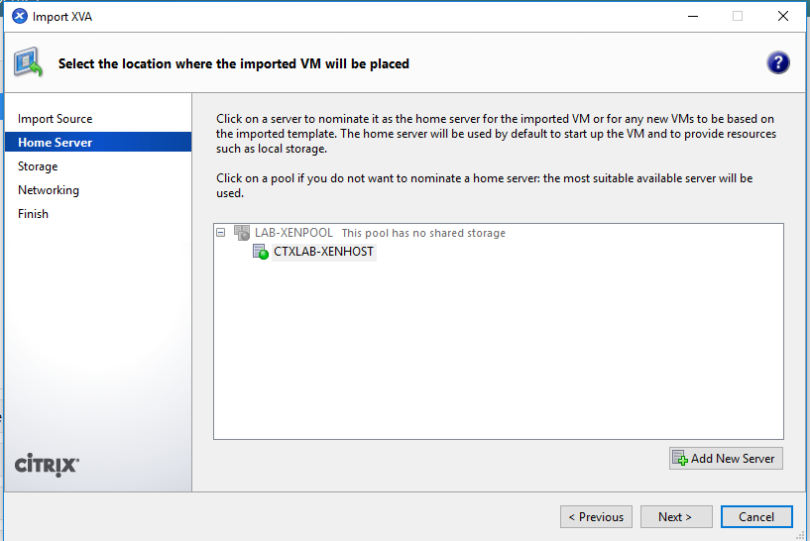
Step 8: Select Storage Repository, Click next 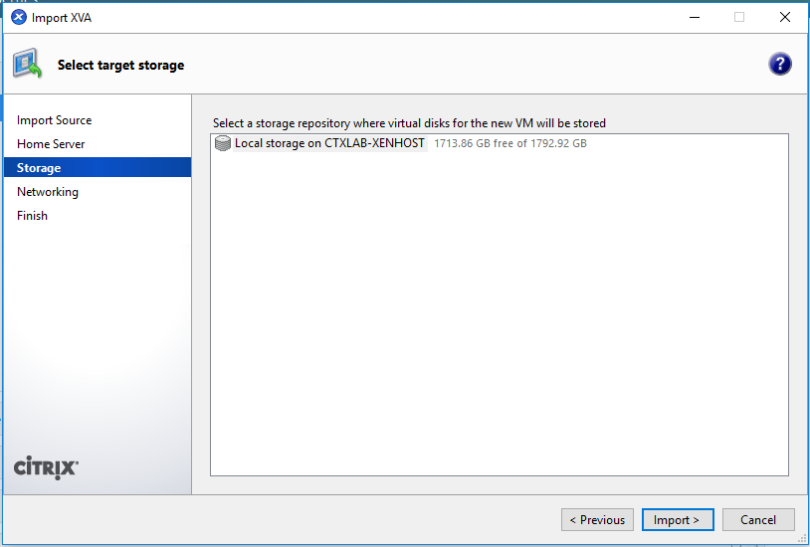
Step 9: Select the Network Interface for Management of the Netscaler, in this case Network 0, Click Next
Step 10: Leave all default settings, Click Finish. VM will be started automatically at this.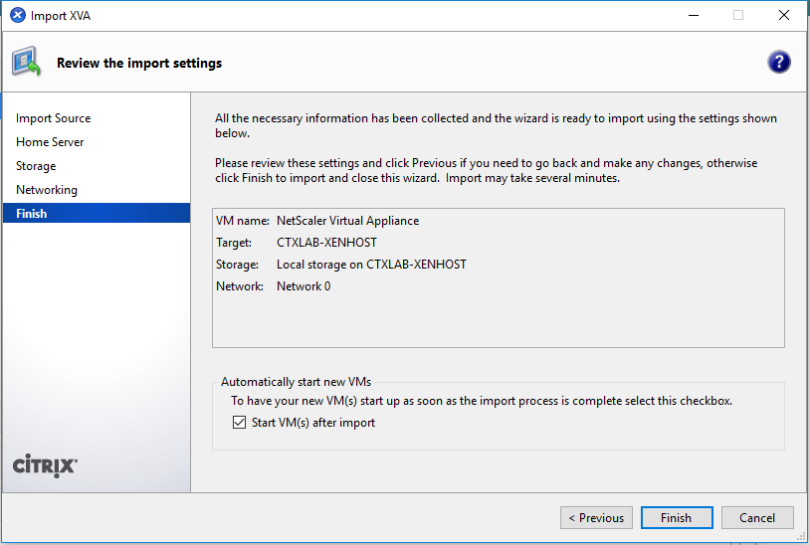
Step 11: VM will appear in XenServer, called Netscaler Virtual Appliance
![]()
Step 12: Console onto the VM, the below screen will appear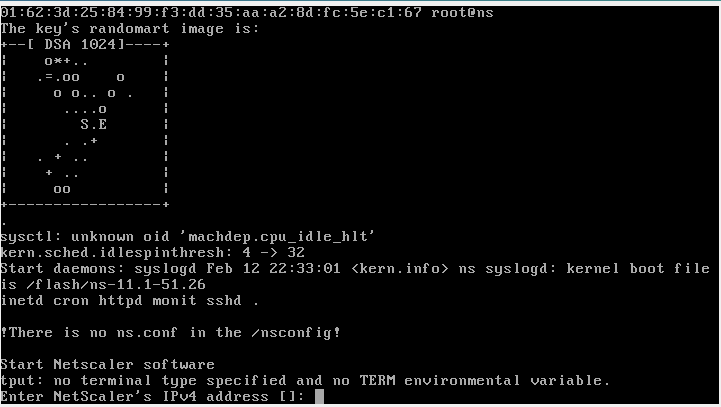
Step 13: Enter the management IP Address of the Netscaler (in this case 192.168.0.90), Hit Enter
Step 14: Enter the subnet mask (in this case 255.255.255.0) , Hit Enter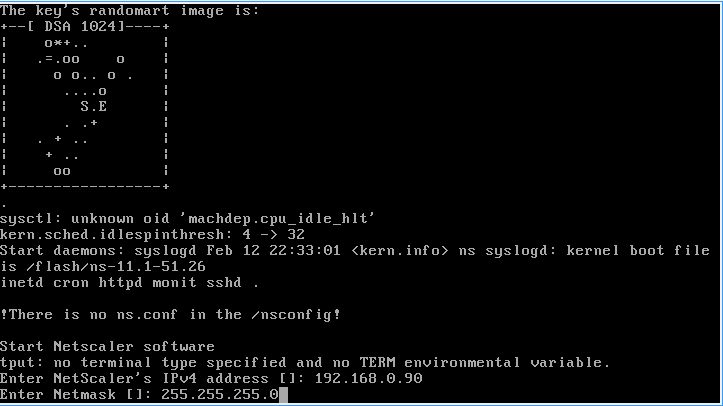
Step 15: Enter the gateway IP (in this case 192.168.0.1), Hit Enter
Step 16: Type 4 – Save & Quit, Hit Enter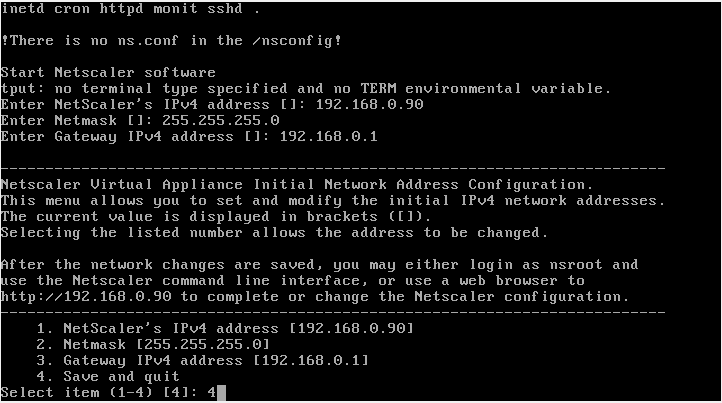
Step 17: Netscaler will configure the appliance, and display the below login prompt when ready to be logged in. 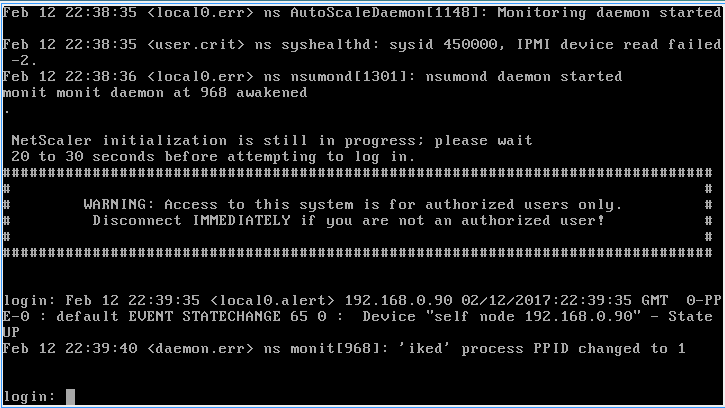
Step 18: Launch IE/Chrome and enter http://[Management IP (in this case http://192.168.0.90) 
Step 19: Enter the default username/password (which is nsroot/nsroot), Click Log On 
Step 20: A Citrix User Expirence Improvement Program window will appear, click Skip 
Step 22: Welcome page will display, 1 showing as complete (Netscaler IP Address), Click on Step 2 (Subnet IP Address)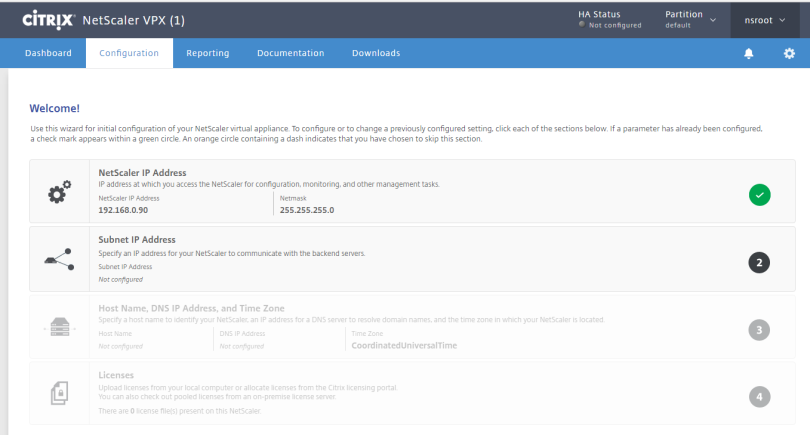
Step 23: Enter Subnet IP (in this case 192.168.0.99), subnet mask 255.255.255.0. Click Done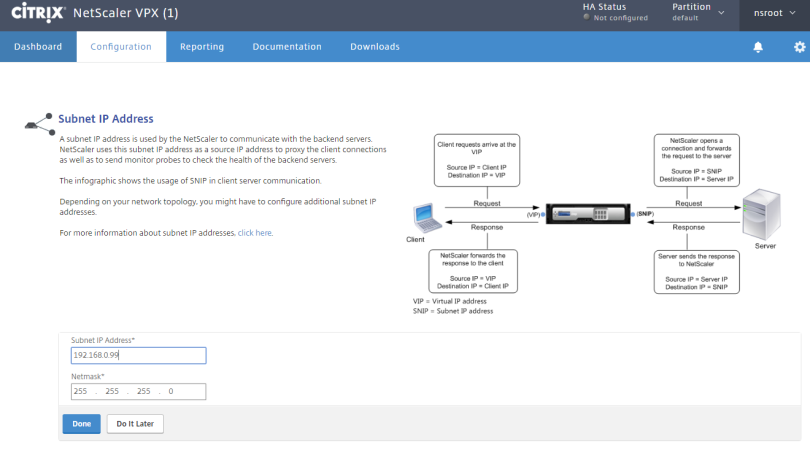
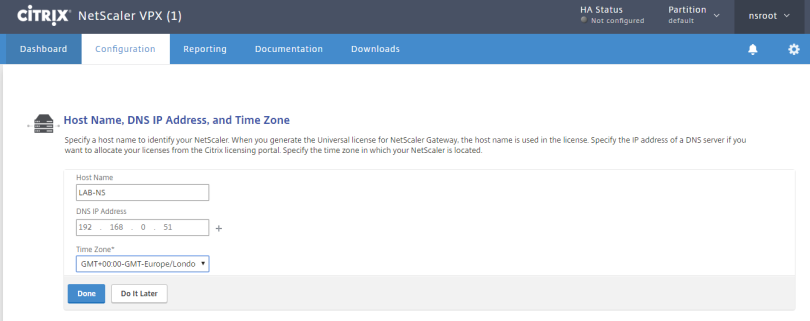
Step 24: Click Step 3, At Home Name/IP Address and Time Zone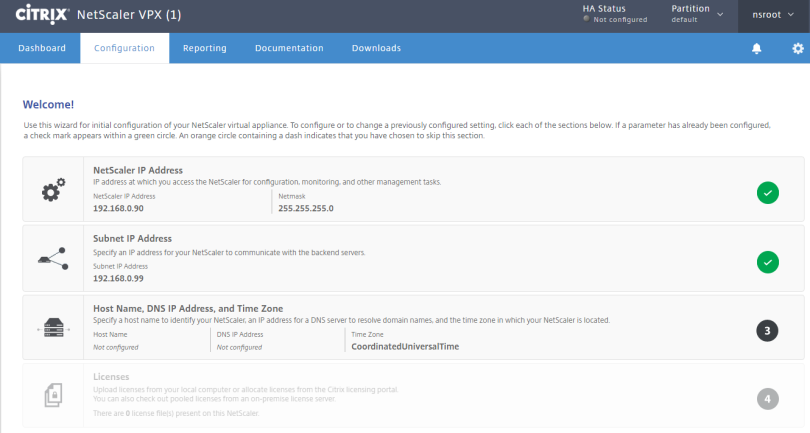
Step 25: Enter the following information , and then click Done
- HostName: LAB-NS
- DNS IP Address: 192.168.0.51 (in this case for LAB)
- Time Zone: GMT+00:00-GMT-Europe/London
Step 26: At Step 4 – Click Licenses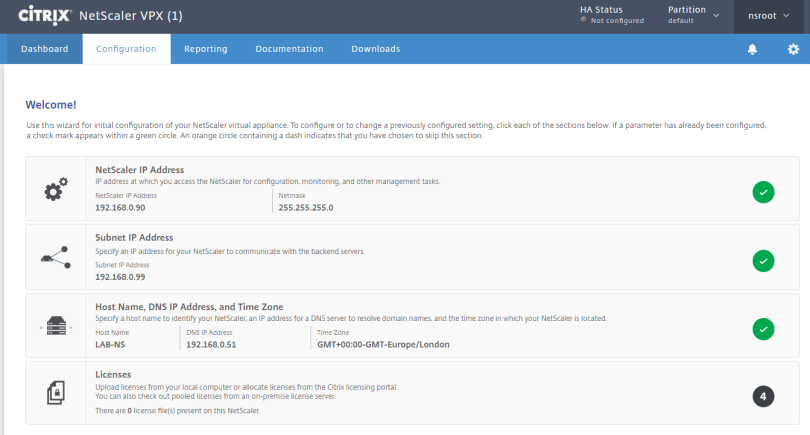
Step 27: Click Add New License (Add new License)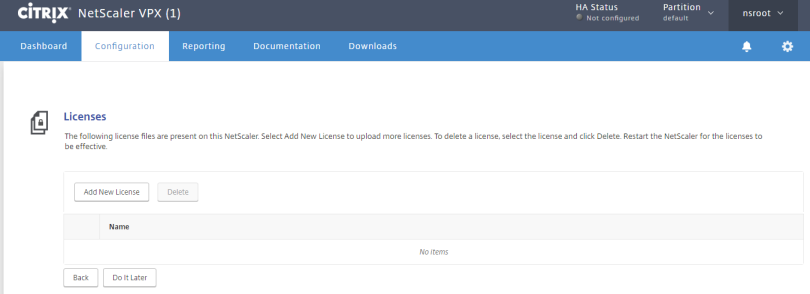
Step 28: Select Upload license files, Click Browse and Locate License file obtained from Citrix Licensing
Step 29: The License file is updated successfully, Green tick will appear. Click reboot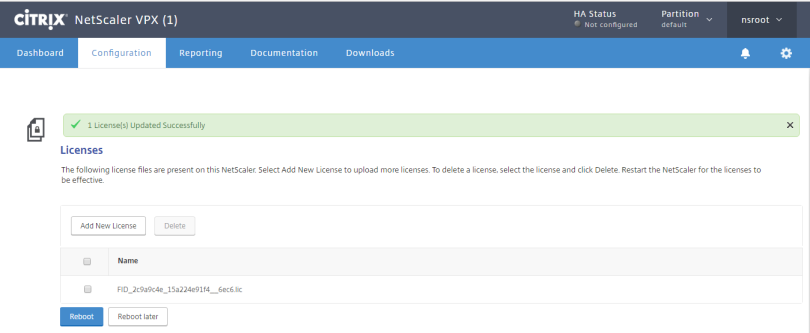
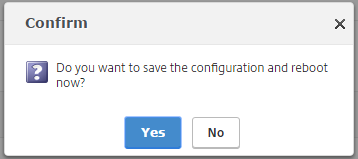
Step 30: Click Yes to reboot and save configuration
Step 31: The following will appear for 1 minute
Step 32: The login windows will appear automatically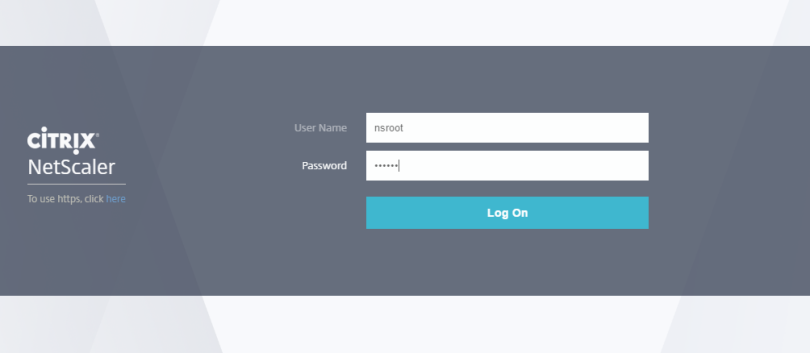
Step 33: Upon logon the license window will appear showing what is license and top left corner will show the VPX model (in this case VPX 3000)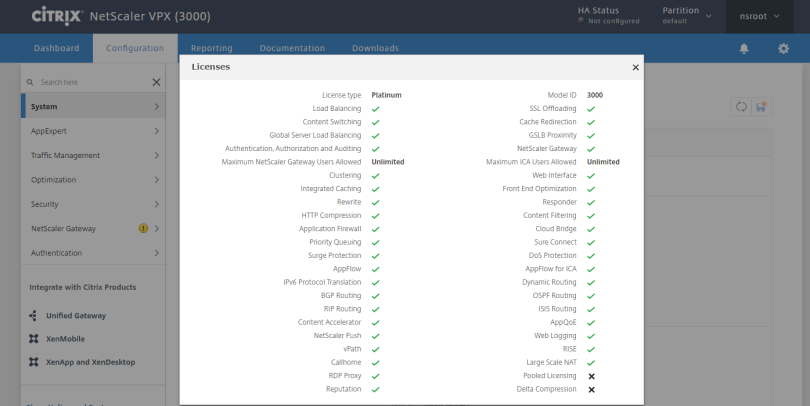
Importing Virtual Appliance into XenServer
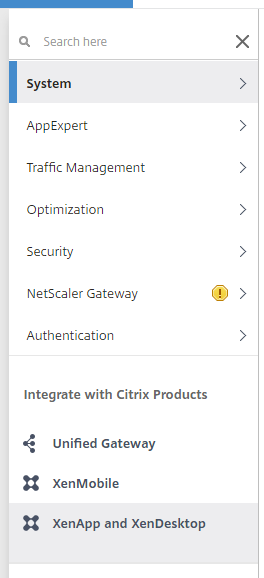
Step 1: On Left hand Panel, Click System ->XenApp & XenDesktop
Step 2: At Netscaler for XenApp and XenDesktop , Click Get Started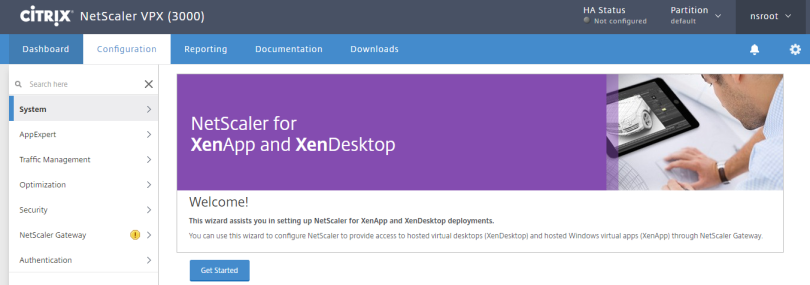
Step 3: Click Storefront, this screen also lists the prerequisites for the wizard so please have these at hand. Click Continue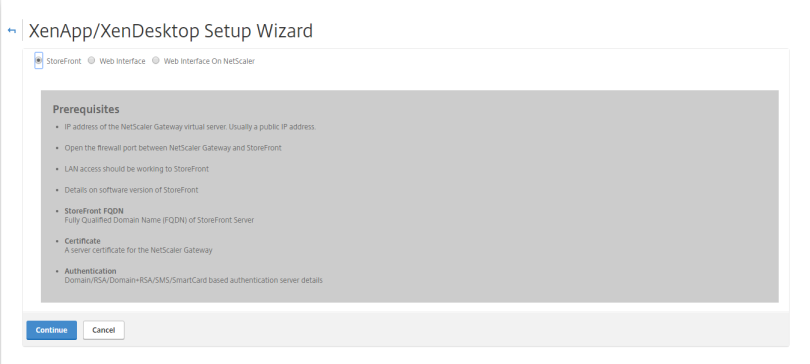
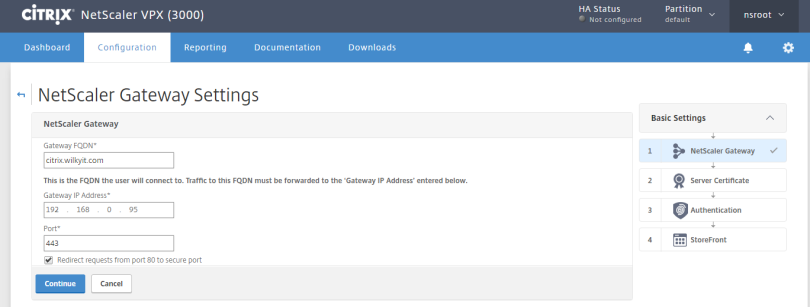
Step 4: At Netscaler Gateway Settings, Click Continue
- Gateway FQDN: Citrix.Wilkyit.com (in this case)
- Gateway IP: 192.168.0.95
- Port: 443
- redirect requests from port 80 to secure port (ticked)
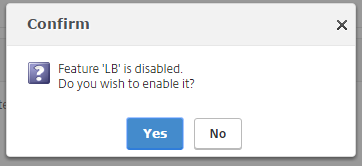
Step 5: A Windows will appear , showing Feature LB is disabled. Do you wish to enable it. Click Yes (this is required for enabling
Step 6: Server Certificate section will now appear, click Choose File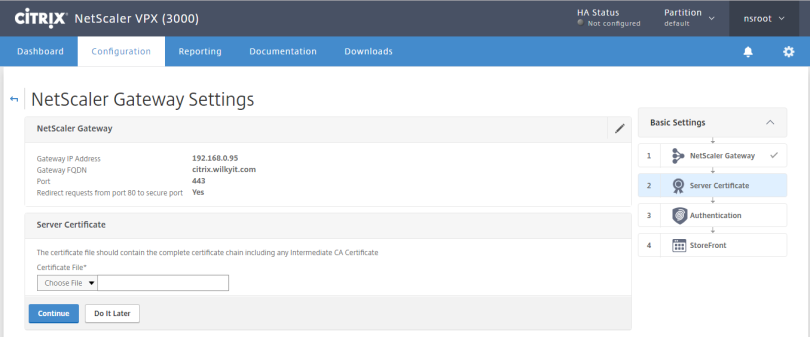
Step 7: Select your .CRT file (in my case citrix.wilkyit.com-certificate.crt)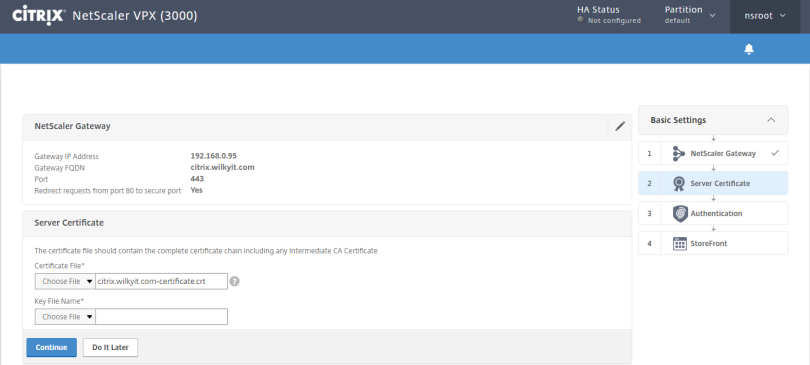
Step 8: Select the certificate private key (in my case citrix.wilkyit.com-private.key) then click Done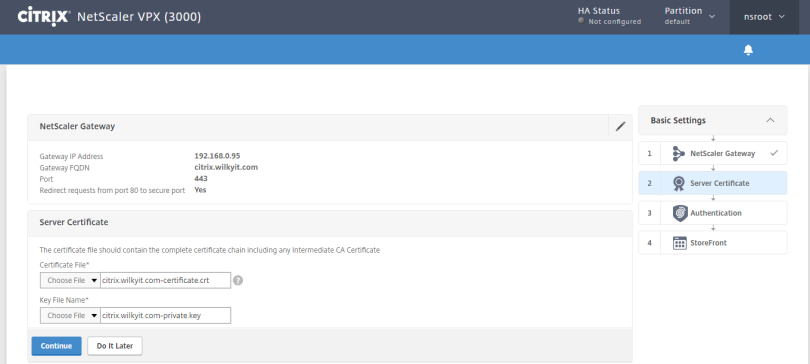
Step 9: Authentication section will appear

Step 10: Enter the following and click Test Connection
- Authentication type: Domain
- IP Address : 192.168.0.51
- Port: 389
- Base DN: dc=lab,dc=local
- Service Account: svc-nsread
- Password: password created for service account.

Step 11: Confirm Server Reachable/Port Open/Valid LDAP Server and Credential are valid (all good when Green box is shown around this information)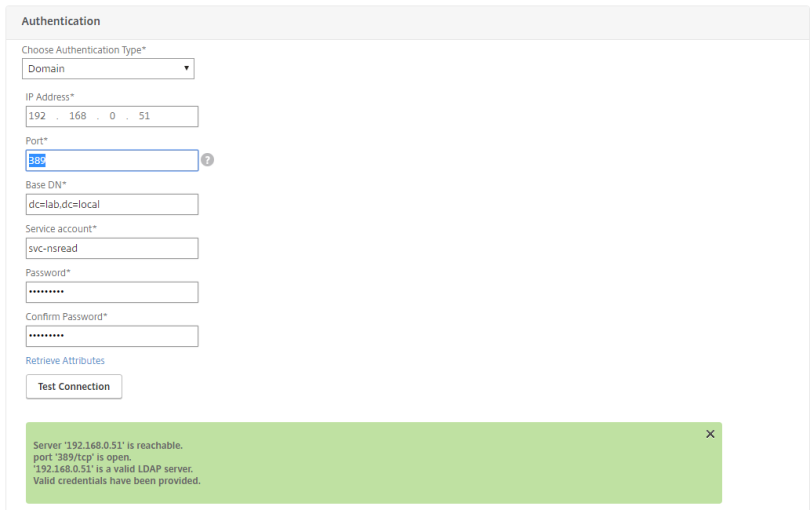
Step 12: Ensure timeout is 3ms, Server logon attribute is sAMAccountName then click Continue
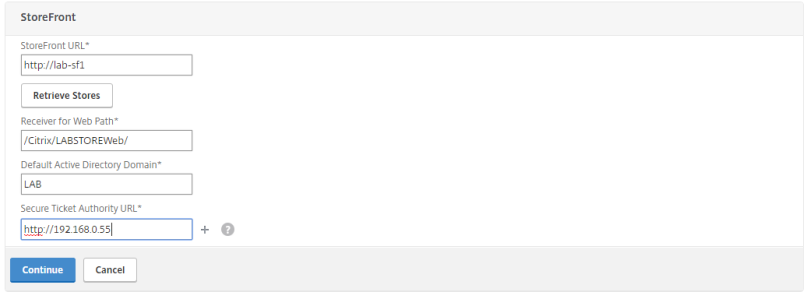
Step 13: Storefront Section will appear, enter http://lab-sf1 or http://lab-sf1.lab.local or http://192.168.0.56 and click Retrieve Store
Step 14: Add the following information (if not already populated by the Retrieve Store) and click continue
- Receiver for Web Path : /Citrix/LabStoreWeb
- Default Active Directory Domain : LAB
- Secure Ticket Authority (STA) URL : http://lab-ddc1 or http://lab-ddc1.lab.local or http://192.168.0.55
Step 15: Confirm All settings are correct, click Done to complete the wizard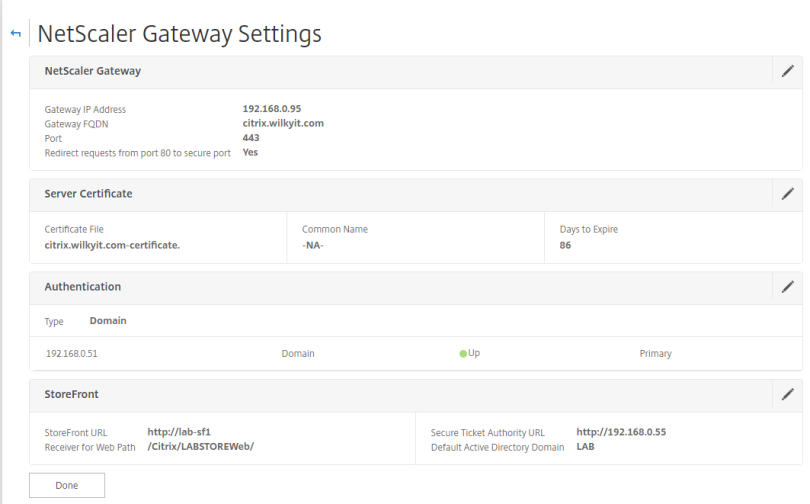
Validate Wizard Configuration/Link Certificates
Step 1: Browse the Netscaler Gateway/Virtual Server and Click _XD_192.168.0.95_443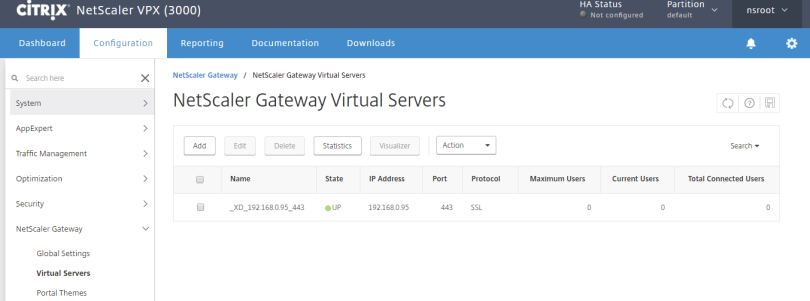
Step 2: Under Basic Setting, Click Edit (top right pencil icon)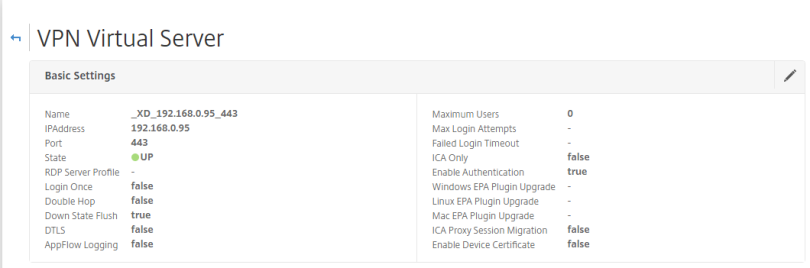
Step 3: Click ..More

Step 4: Untick ICA Only, Click OK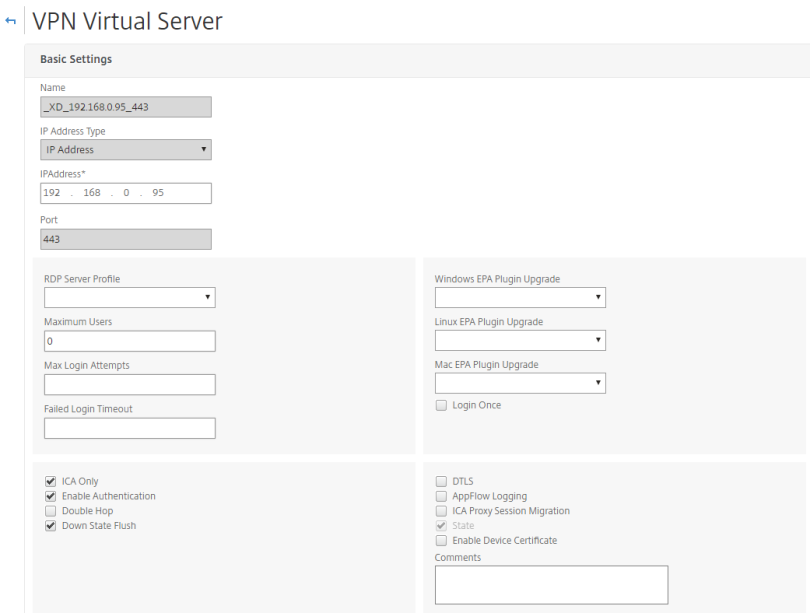
Step 5 : Under Published Application , Click 1 STA Server
Step 6: Confirm State Status is UP, click Close, Click OK to return to Netscaler Main Page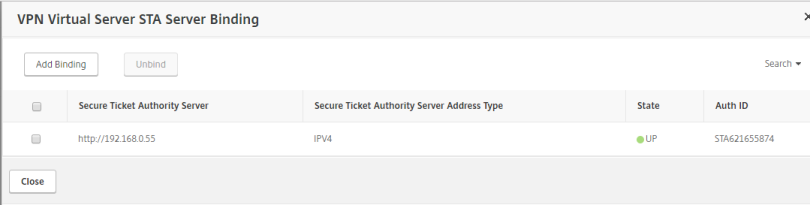
Step 7: Browse to Traffic Management/SSL/Certificates/CA Certificates
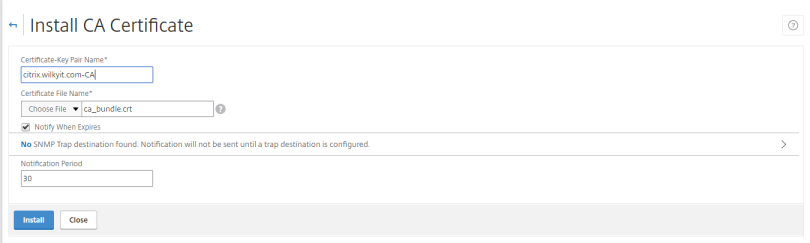
Step 8: Click Install CA Certificate, enter the following details and click Install
- Certificate-Pair Name: In my case (Citrix.Wilkyit.com-CA)
- Certificate File Name: In my case ca_bundle.crt (provided by vendor of SSL)
- Notify when expires: Ticked
- Notification period: 30
Step 9: Confirm Certificate shows as installed.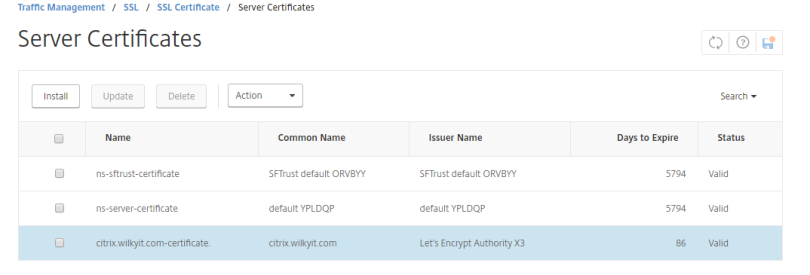
Step 10: Click Server Certificates, right click the Citrix.Wilkyit.Com-Certificate (installed as part of wizard) and click Link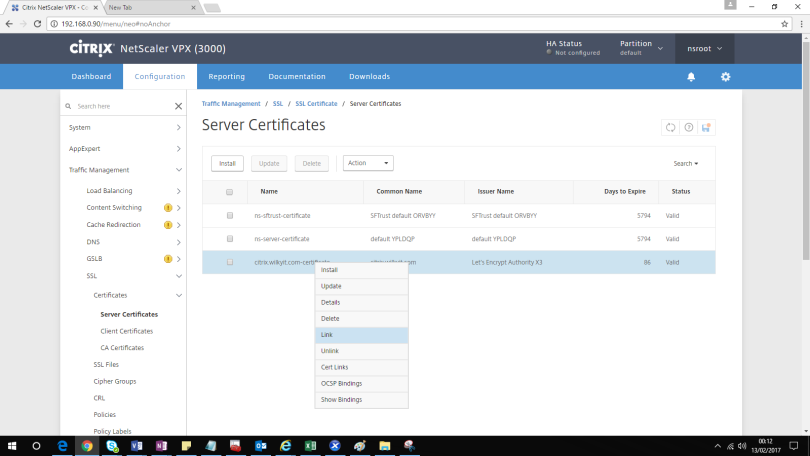
Step 11: Choose CA Certificate Name (in my case Citrix.wilkyit.com-CA)

Test Netscaler Gateway
Step 1: Access External URL (https://citrix.wilkyit.com)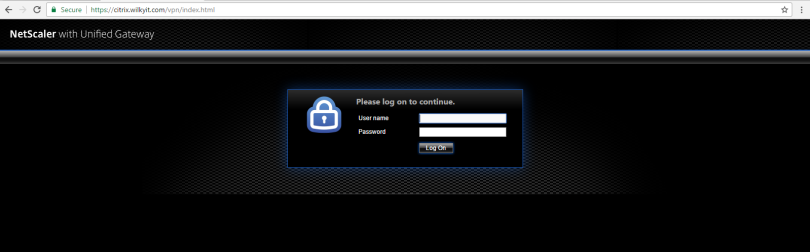
Step 2: Enter Username & Password for user (in my case ctxuser1) who has access to a Widnows 10 – Shared Desktop and Click Log on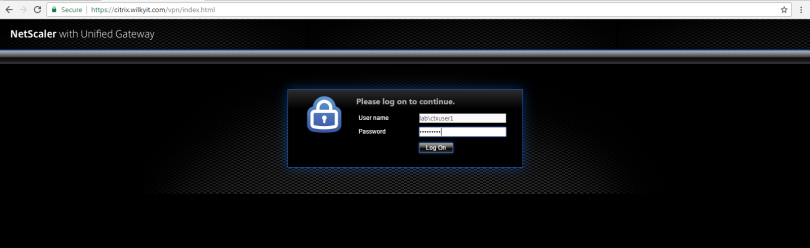
Step 3: Citrix Receiver window will appear , with a rotating progress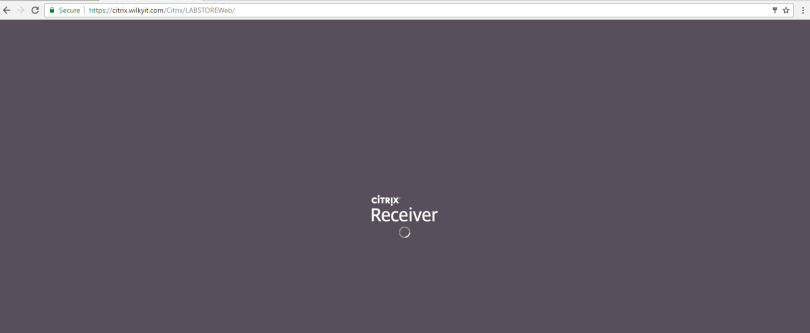
Step 4: The List of Applications will be displayed. Click Windows 10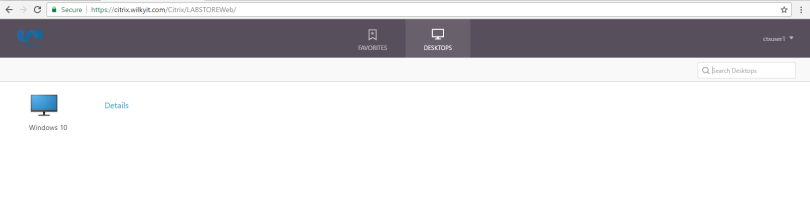
Step 5: The ICA session to begin to connected and Windows 10 Shared Desktop will be diplayed.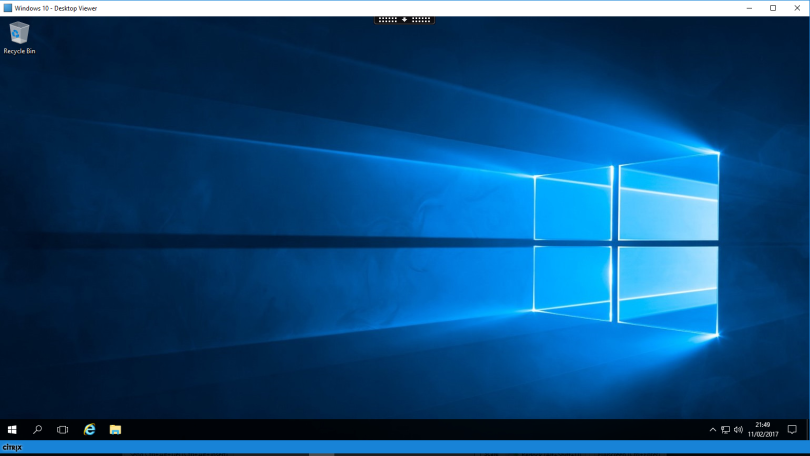
How can you have 2x DDC (lab-ddc1 & lab-ddc2), both have DC, Studio, Director & Lic-server? plus load-balancing them on Netscaler?
Can you expand on this in more detail, i don’t understand the context of the question.