
Load Balance Overview
The following PVS VM’s will be used in the LAB Setup for Load Balancing:-
- LAB-PVS1 : 192.168.0.45
- LAB-PVS2: 192.168.0.46
LAB-PVS2 has been created and added as an additional PVS Server.
Add Load Balance Configuration
Step 1: Browse to Traffic Management > Load Balancing > Servers

Step 2: At Server, Click Add

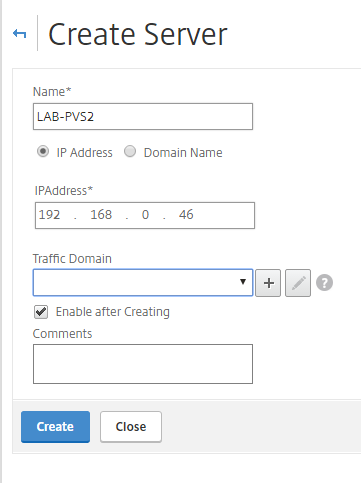
Step 3: Enter Name and IP Address below, then click create
- Name: LAB-PVS1
- IP Address: 192.168.0.45

Step 4: Click Add again under Server, Enter Name and IP Address below, then click create
- Name: LAB-PVS2
- IP Address: 192.168.0.46
Step 5: The two server will now be add to server page.

Step 6: Browse to Traffic Management > Load Balancing > Monitors and Click Add

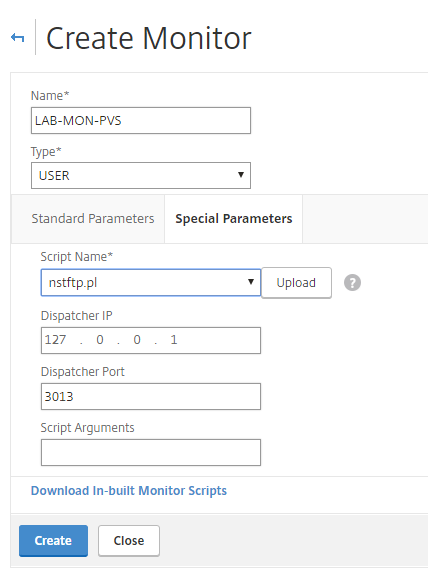
Step 7: At Create Monitor, enter the following details and then click Special Parameter
- Name: LAB-MON-PVS
- Type: USER

Step 8: Under Script Name, choose nstftp.pl and click Create.
Step 9: Browse to Traffic Management > Load Balancing > Service Groups

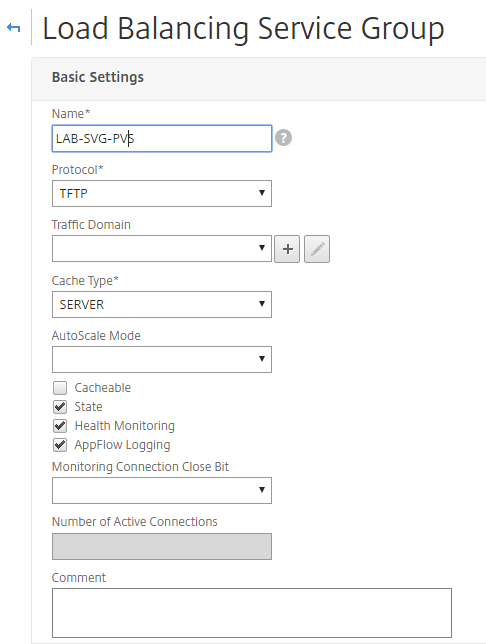
Step 10: Add the following info on basic setting, click OK
- Name: LAB-SVG-PVS
- Protocol: TFTP
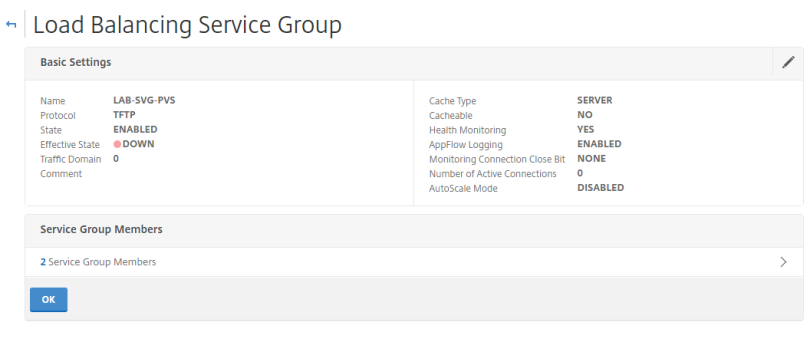
Step 11: Click No Service Group Members under services and groups section
Step 12: Tick Server LAB-PVS1, Click Select

Step 13: Under Select Server Choose LAB-PVS1 , Add Port 69 , click create and then repeat step 11/12 for LAB-PVS2
Step 14: Click OK at Load Balancing Service Group Main Page to create Service Group.
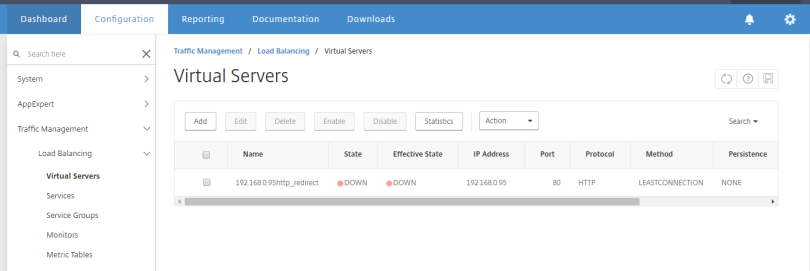
Step 15: Browse to Traffic Management > Load Balancing > Virtual Servers
Step 16:Click Add in Virtual Servers page,Add the following info on basic setting, click OK
- Name: LAB-VSRV-PVS
- Protocol: TFTP
- IP Address : 192.168.0.94
- Port: 69

Step 17: Select No Load Balancing Virtual Server ServiceGroup Binding
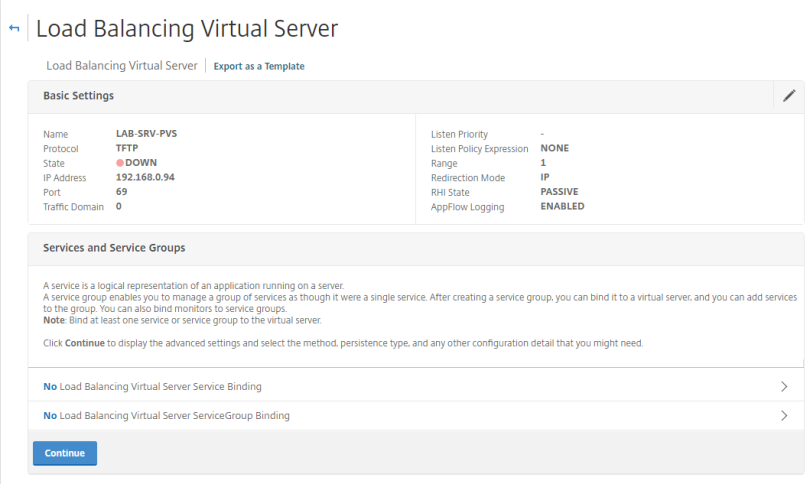
Step 18: Click Click to Select

Step 19: Click LAB-SVG-PVS, Click Select
![]()
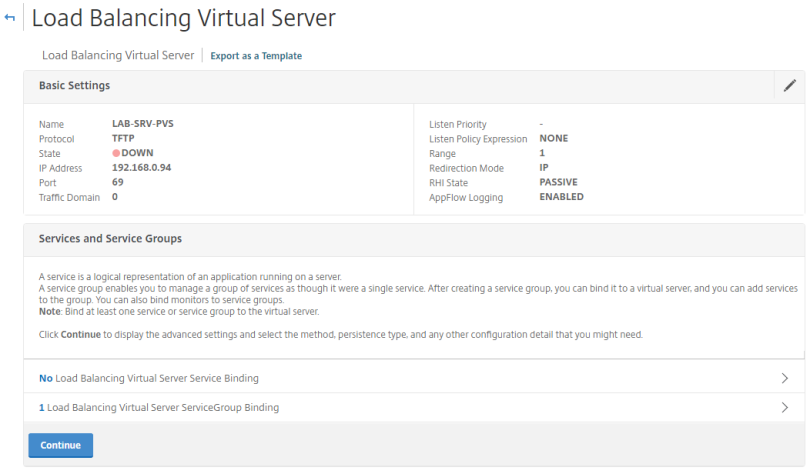
Step 20: Click Bind

Step 21: Click Continue at Load Balancing Virtual Server page
Step 22: Click Done to create Virtual Server , Choose LEASTCONNECTION for Load Balancing Method.

Step 23: Confirm Virtual Server appear Up.
![]()
Confirm Load Balance on PVS
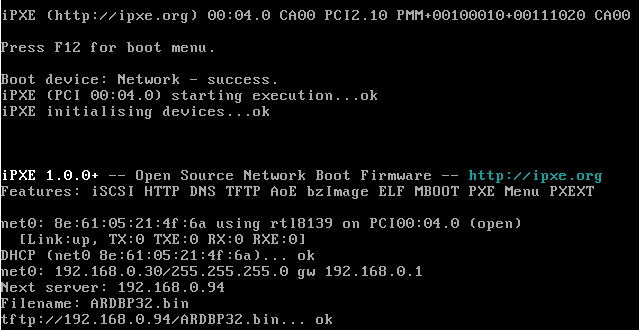
Step 1: As per Configuring PVS – DHCP Option – Step by Step. Configure the DHCP Option 66/67 with the Option 66 IP Address of the VIP (192.168.0.94)
Step 2: Create a New Diskless VM
Step 3: Boot the VM and ensure the ARDBP32.BIN is found as this confirm the VM can reach the PVS Server.
Disable Load Balance LAB-PVS1 Server in Load Balance & Boot.
Enable Load Balance LAB-PVS1 Server in Load Balance , Disable LAB-PVS2 Server In Load Balance and Boot Diskless VM.
Great article, great job! I’ll give it a try.
There is just a little mistake: In step 16 you write “TCP” instead of “TFTP” like in the screenshot.
Cheers
Thank you Bastian, i’ll update this mistake
You didn’t bind your custom TFTP monitor to the SVG in the instructions.
thanks Steve, i’ll update blog.