
Create a OS Layer
See Citrix CTX225952 (4.x Layering Best Practices) – https://support.citrix.com/article/CTX225952
Step 1: Install Operating System (Ensure it is fully Patched) on a new VM (I am installing Windows Server 2016 – VM Name: LAB-APL-OS-W2016)
NOTE: Do not join the Computer to the domain. This will be done at the platform layer.
Step 3: Disable IPv6 (recommend if your deployment mechanism is PVS)
Step 4: Ensure Automatic updates is disabled before continuing

Step 5: Execute “citrix_app_layering_os_machine_tools_4.5.0.exe”, leave destination folder as default and click Install

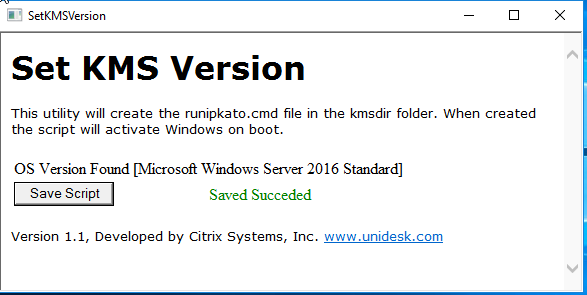
Step 3:Open Command Prompt as administrator and launch C:\windows\setup\scripts\setKMSVersion.hat

Step 3:

Step 3: Saved Succeded will appear .runipkato.cmd will be created in C:\Windows\Setup\scripts\kmsdir which will be used by ELM to activate KMS properly.
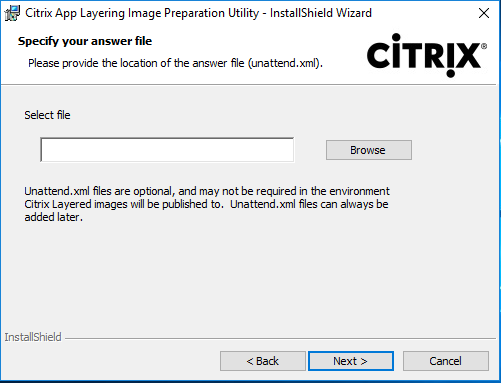
Step 3: Execute “Setup_x64.exe” found in C:\Windows\setup\scripts

Step 4: At Welcome to Installation wizard, Click Next

Step 5: At specify answer file, leave as default as we will be using PVS, Click Next
Step 6: Installation will progress

Step 7: At Install Wizard completed, Click Finish

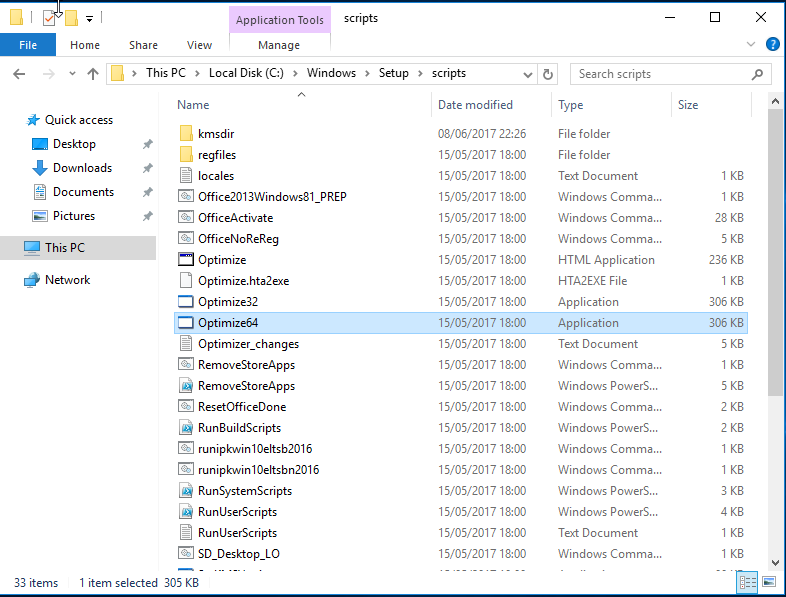
Step 8: Open C:\Windows\Setup\Scripts and run the otpimization script (Optimize64)
Step 9: Citrix Optimization Script builder will be displayed, with various optional customizations. Scroll down to bottom and Click Save to file

Step 10: Run the Optimizations.cmd as administrator to perform the customization on the operating system

Step 10: Shutdown the Machine

Step 10: Ensure in Hypervisor OS is Powered Off.
Step 11: Go back to ELM Appliance , Select Layers>OS Layer and Select Create OS Layer

Step 12: At Create OS Layer Wizard , enter the following information. Click Down Arrow
- Layer Name: W2016OSLayer
- Layer Description: Windows Server 2016
- Version: 1
- Description: add description if required
- Max Layer Size (GB): 60GB

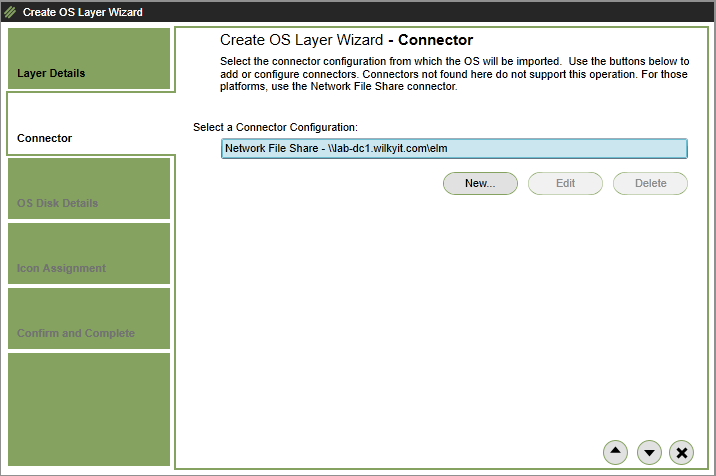
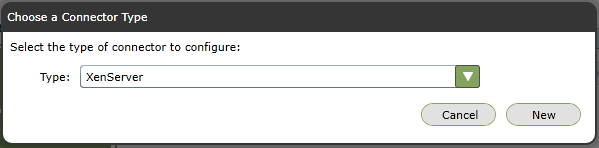
Step 13: At Create OS Layer Wizard in Connector, Select New
Step 14: At connection type, Choose XenServer, Click New
Step 15: At XenServer Connector, add the following information and Click Check Credentials
- XenServer Address: 192.168.0.95
- Username: root
- Password: password of root

Step 16 : AT Virtual Machine Clone Setting, Select the VM Template, Storage and Click Test
- Virtual Machine Template : LAB-APL-OS-2016TMP
- Storage Repository: Local Storage
- Layer Disk Cache Size in GB : Left blank
NOTE: A template needs to be created in XenCentre , no disk should be attached to this template.

Step 17: Ensure Configuration Name is set, i have set XENSERVER-POOL, Click Save

Step 18: Ensure setting save successfully , then click Close

Step 19: At Connector Configuration, now Select the newly created XenServer, then Click Down Arrow

Step 20: At OS Disk Details, Click Select Virtual Machine

Step 21: At XenServer Connector, Specify the LAB-APL-OS-W2016 and Click Save

Step 22: Confirm the OS Machine Name/Disk Size and click Down Arrow

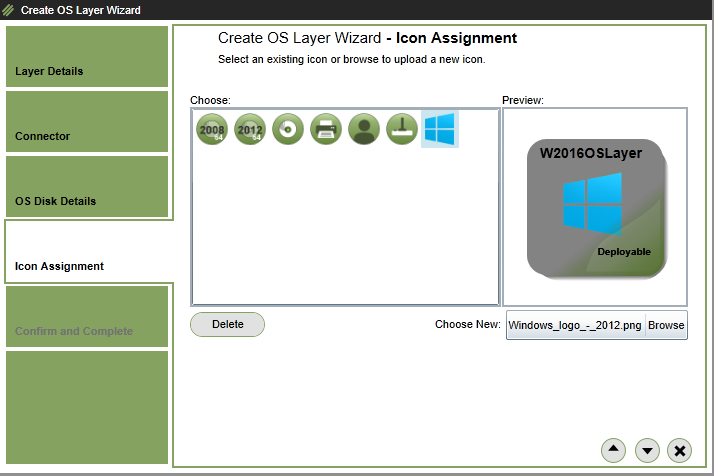
Step 23: At Icon Assignment, leave default or assign a different icon. Click Down Arrow.
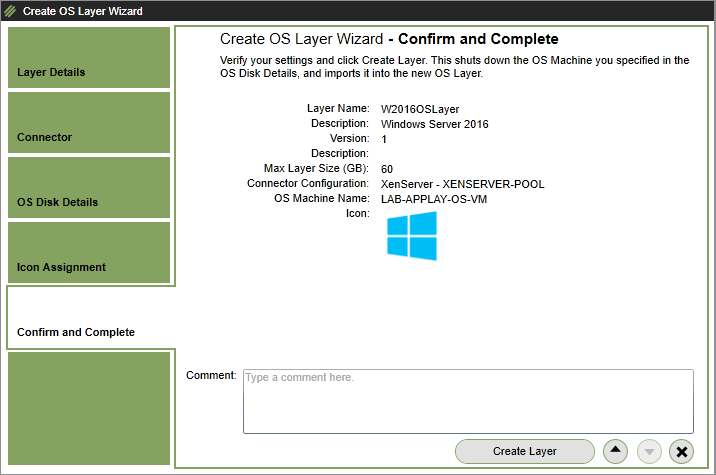
Step 24: Ensure all details are correct and click Create Layer
Step 25: The OS Layer will now be imported into the Appliance and appear as not deployable until it fully imports

Step 26: Expand Tasks to confirm import is running, this may take a number of minutes to complete.

Step 27: Once successfully imported, the OS Layer “W2016OSLayer” will now appear as deployable

Create a Platform Layer
The Platform Layer is where hypervisor tools, VDA tools and PVS Target Device software are installed.
See the following Citrix Article CTX225997 Considerations When Creating a Platform Layer in Citrix App Layering 4.x.
Step 1:Within the UMC, navigate to Layers -> Platform Layers -> Create Platform Layer.
Step 2: Enter the following details and then Click Down Arrow
- Layer Name : VDA W2016 x64 (OS version is included as Platform layer is linked to specific OS Layer)
- Version: Indicate the version (i have specified 7.15 which is the version of VDA)
- Max Layer Size (GB): Leave default which is 10GB

Step 3: Select the Windows 2016 OS Layer (W2016OSLayer -1), Click Down Arrow

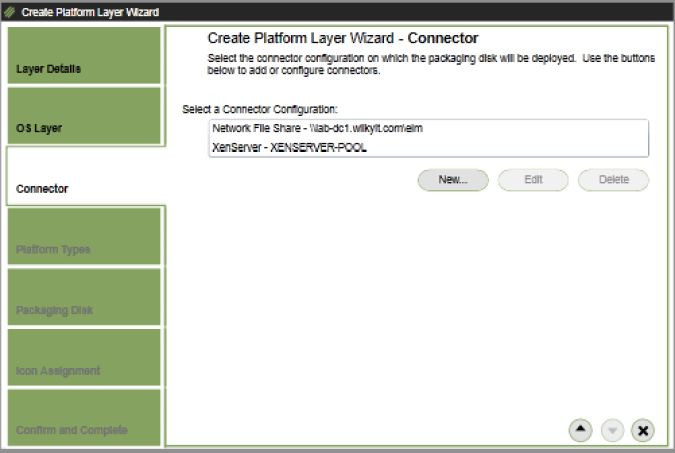
Step 4: Select XenServer – XENSERVER-POOL, Click Down Arrow
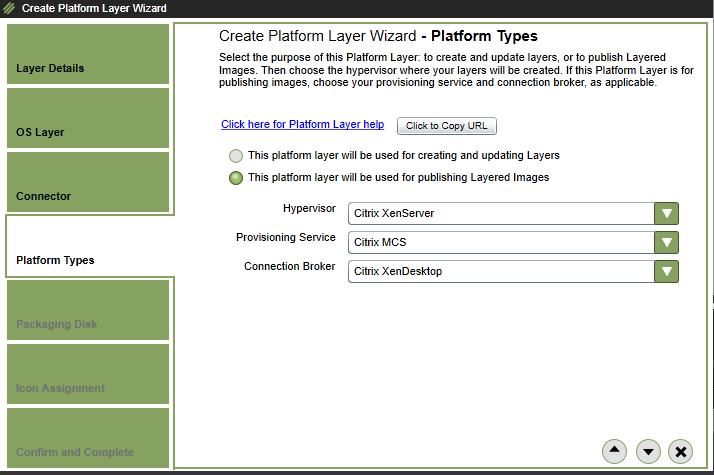
Step 5: Select “This platform layer will be used for Publishing Layered images”, enter the following details then Click Down Arrow
- Hypervisor: Citrix XenServer
- Provisioning Service: Citrix MCS
- Connection Broker: Citrix XenDesktop
Step 6: Enter Package File Name “VDA W2016 MCS” and Specify Disk Format “VHD”, Click Down Arrow

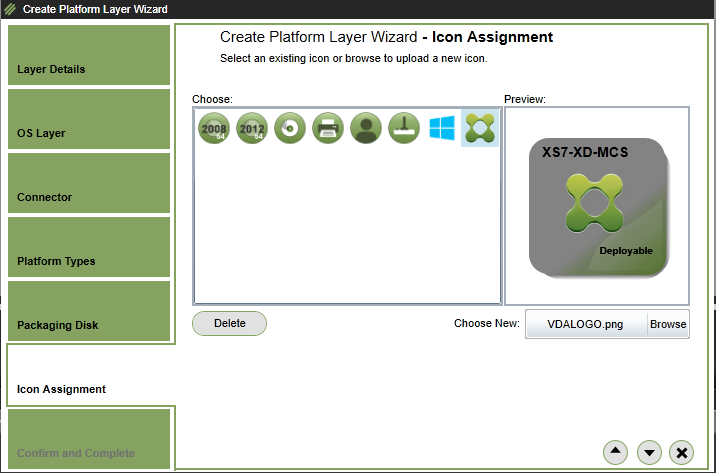
Step 7: Select the Appropiate Icon for the Platform Layer, Click Down Arrow
Step 8: Verify the details of the configuration, Click Create Layer

Step 9: The VDA W2016 x64 Platform layer will appear as not deployable.

Step 10: Expand the Task pane at bottom , there is a pending action which is creating the platform layer.

Step 11: At bottom task windows, the platform layer will be created and progress given at what stage it is at.

Step 12: Power up the VM Created on XenCentre
![]()
Step 13: Join Computer to the WILKYIT.COM Domain (OS & App Layer must not be joined to domain)
NOTE: Domain Join in Platform Layer does not capture local groups changes , there following must done.
- Add Domain Admins group to the local Administrators group
- Add Domain Users group to the local Users group
This is best to be done through Group Policy and applied to the Computer Account
Step 14: Now Install the VDA
Download the Citrix 7.15 ISO from the Citrix Downloads (XenApp_and_XenDesktop_7_15.iso) and Click Upgrade Studio and Server Components

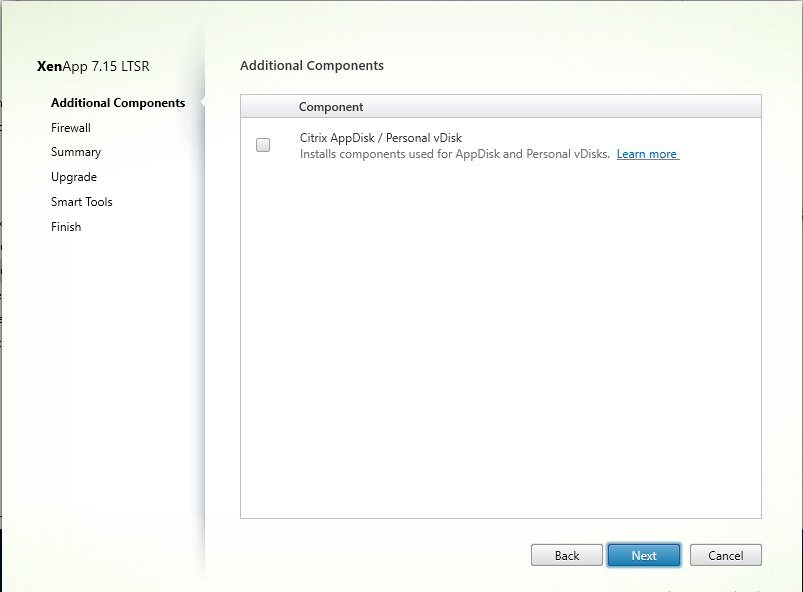
Step 15: At additional components, click next
Step 16: Leave configuration at “Automatically”, Click Next
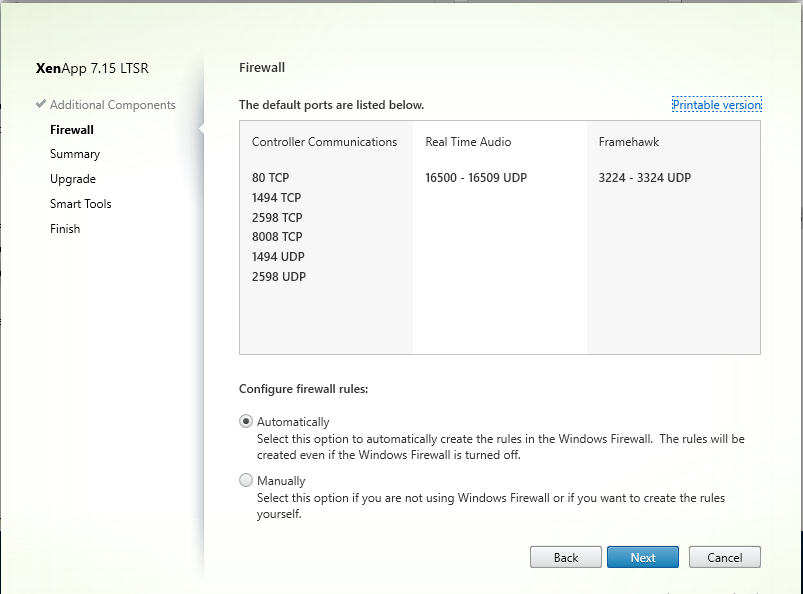
Step 17: At Summary screen, confirm everything is correct, Click Upgrade

Step 18: Click OK at warning that you cannot cancel the upgrade to proceed..

Step 19: Core components will be upgraded.

Step 20: At Smart Tools, Select i do not want to participate in Call Home

Step 21: After upgrade has finished. Click Finish
Step 22: As platform layer layer does not capture/merge local groups created during the VDA Install. The following must be done (best via Group Policy)
- Create Direct Access Users local group.
- Create Local Anonymous group
- Add Domain Users or Authenticated Users group to the local Remote Desktop Users (could also be to the local “Users” group)
- Add NT SERVICE\BrokerAgent account to the local Performance Monitor Users group
- Add NT SERVICE\CitrixTelemetryService account to the local Performance Log Users group
Step 23: Click Shutdown for Finalise

NOTE: if there is pending reboot due to software installs, updates etc. The below message will be shown. Reboot the machine to ensure there no pending reboot

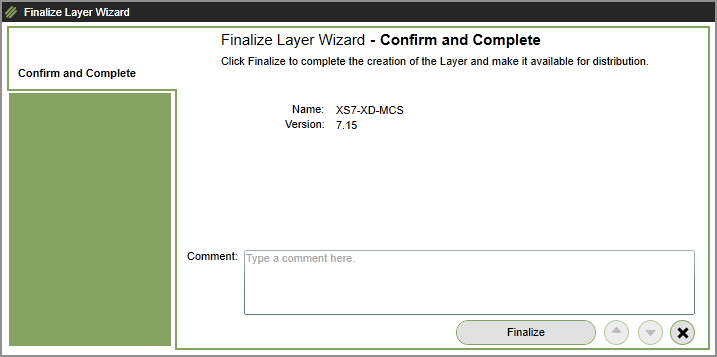
Step 23: Within the UMC, navigate to Layers -> Platform Layers. Right Click VDA W2016 x64 Platform Layer, Click Finalize

Step 24: Click Finish at Finalize Layer Wizard
Step 25: Expand the Task pane at bottom , there is a pending action which is finalising the platform layer.

Step 26: It will eventually complete, with the below message confirming it is ready for use

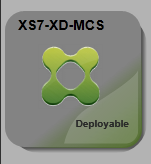
Step 24: The Platform layer has now changed to Deployable.
Next – Citrix Application Layering 4.x – Creating App Layers , Templates and Publishing