
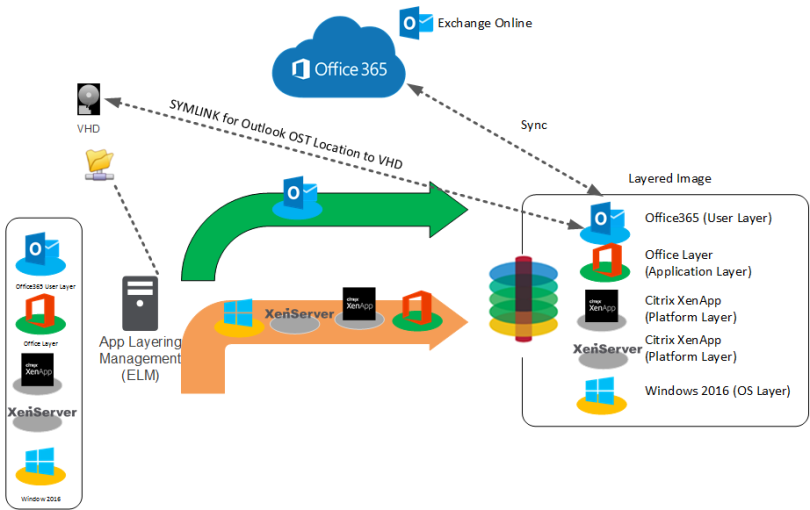
As indicated by What’s new in Citrix App Layering 4.8 – https://docs.citrix.com/en-us/citrix-app-layering/4/whats-new/4-8.html .A new type of User layer for Office 365 allows you to preserve users’ data and configuration settings when elastically assigning Office 365 layers.
This was previously in Labs from version 4.6, but is now ready for production environment use.
This article is intended to be used to help setup/understand and test the office 365 layer in a test environment.
NOTES:
- Citrix User Profile Manager (UPM) is required to use Office 365 User Layer.
- Ensure %USERPROFILE%\AppData\Local\Microsoft\Outlook is in the exclusion list.
- Office layer must be included in the image template and deployed in the layered image.
- An image can be set to include either a full User Layer or an Office 365 User Layer, not both.
- No other applications can be elastically layered in the image – This seems to be pretty limiting!
- It only redirects Microsoft Outlook folder “%USERPROFILE%\AppData\Local\Microsoft\Outlook” not Search/OneDrive for Business/Lync.
- One desktop per user at a time is being tested. I take from this VHD can only be access by 1 user at a time(no multi-session)
- Documentation on the citrix site is being updated regularly and should be checked on this specific feature as more is understood.
Some of the above notes maybe changed/removed and improved it is developed in future releases.
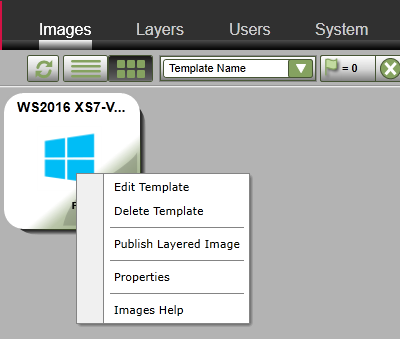
Step 1: Adjust the template, browse to Images, Right Click Image Template and Click Edit Template
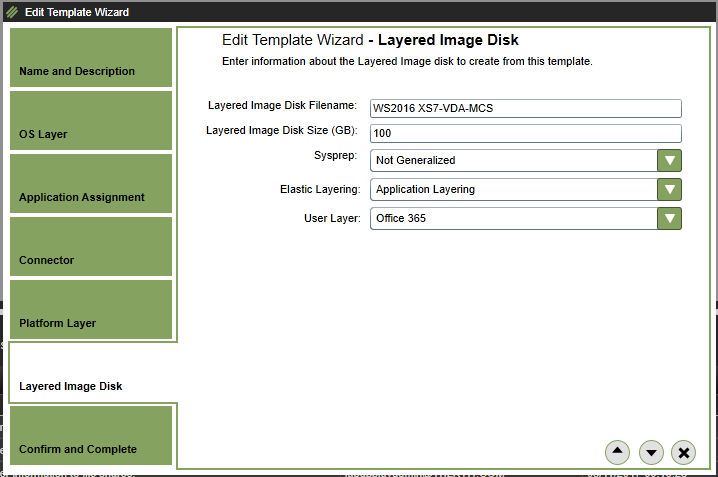
Step 2:Choose the Layered Image Disk , Under User Layer Select Office 365, Click the down arrow and then Update template.
Step 3:Then Click Publish Layered Image

Step 4:Then Click Publish Layered Image

Step 5: The published layered image will then be updated to include the O365 User layer setting enabled.

Step 6: Login as user (i am using a standard user called CtxUser1)
Reviewing the ELM remote share the Office 365 layer will create “%username%_O365.vhd” under the following folder “\Users\[%DOMAIN%_%USERMAME%\C8000_WS2016OSLayer]\”

Default size of the VHD is 30MB
Step 7: Setup Outlook in cache mode (if not already) as shown below.

Ensure Microsoft Outlook shows “All Folders are up to date” to indicate the cache has been fully downloaded.
![]()
Step 8: Reviewing the size of the O365 layer VHD , it has increased to 116MB based on the size of the cached mailbox auto-increasing the VHD size.

Taking a Look inside the VHD (using 7zip Read only access) you can see the following:

Browsing through you can see “C:\Users\%USERNAME%\AppData\Local\Microsoft\Outlook” is the following folder where the outlook cache is contained:-

Other Information.
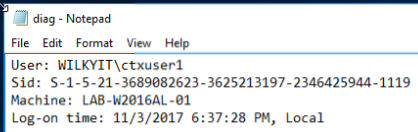
Diagnostic log file is created on the same directory as the VHD file. It indicates the user, SID, machine accessing the VHD and Logon-time. Below is an example of the diagnostics log files.
2 comments