
As per Citrix recommendation on upgrading the below flowchart will be used to upgrade from 7.12 to 7.13

- Make sure that your Subscription Advantage date for licenses is valid.
- Back up the Delivery Controller databases.
- Upgrade Director if it is installed on a separate machine from your Delivery Controllers.
- Backup templates and upgrade hypervisors (optional).
- Upgrade Provisioning Services if in use.
- Upgrade the Virtual Delivery Agent and perform an image update on all master images.
- Upgrade half of your Delivery Controllers (all components).
- Use the upgraded version of Studio to perform Site upgrade.
- Upgrade your remaining Delivery Controllers (all components).
StoreFront Upgrade
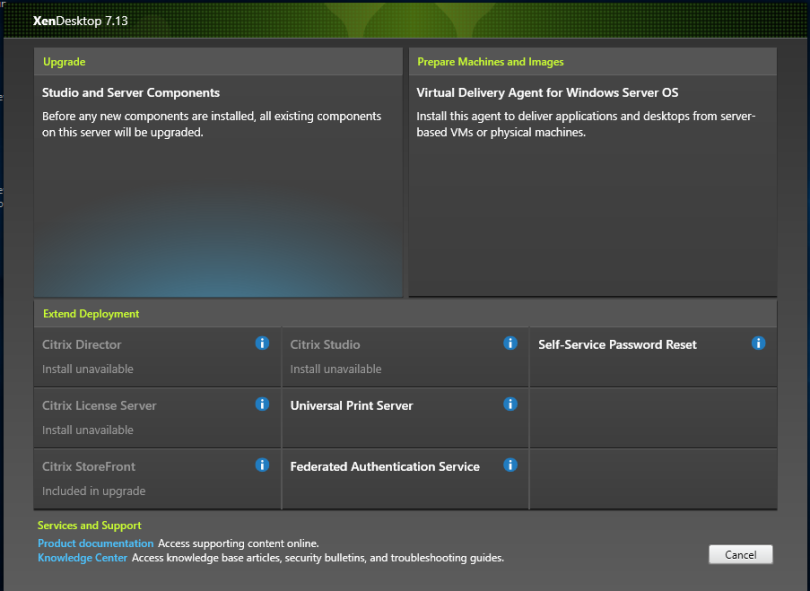
Step 1: Download the Citrix 7.13 ISO from the Citrix Downloads (XenApp_and_XenDesktop_7_13.iso) and Click Upgrade Studio and Server Components
Step 2: Accept the terms and license agreement, click on Next
Step 3: At Ensure a Successful upgrade, tick I’m ready to continue , Click next
Step 4: Leave configuration at “Automatically”, Click Next
Step 5: At Summary screen, confirm everything is correct, Click Upgrade
Step 6: Prerequisites and Upgrades will now be installed.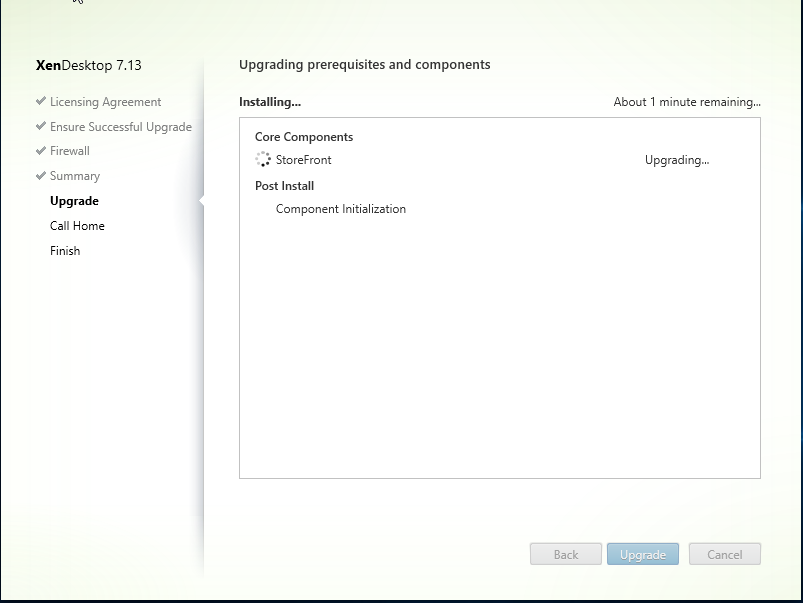
Step 7: At Call Home, Select i do not want to participate in Call Home
Step 8: Click Finish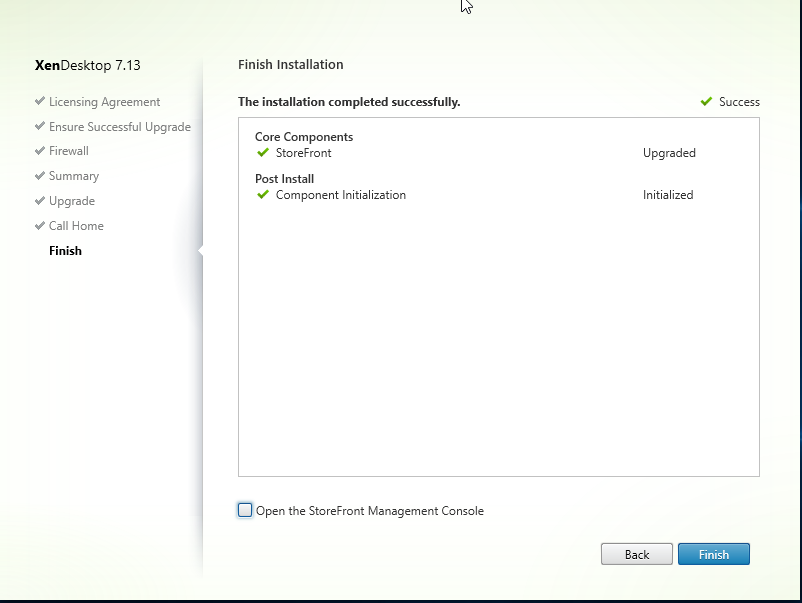
Step 9: Repeat this on every StoreFront Server
Upgrade VDA’s (On Master Image)
Step 1: Download the Citrix 7.13 ISO from the Citrix Downloads (XenApp_and_XenDesktop_7_13.iso) and Click Upgrade Studio and Server Components

Step 2: At additional components, click next
Step 3: Leave configuration at “Automatically”, Click Next Step 4: At Summary screen, confirm everything is correct, Click Upgrade

Step 5: Prerequisites and Components will now be upgraded.
Step 6: Core components will be upgraded.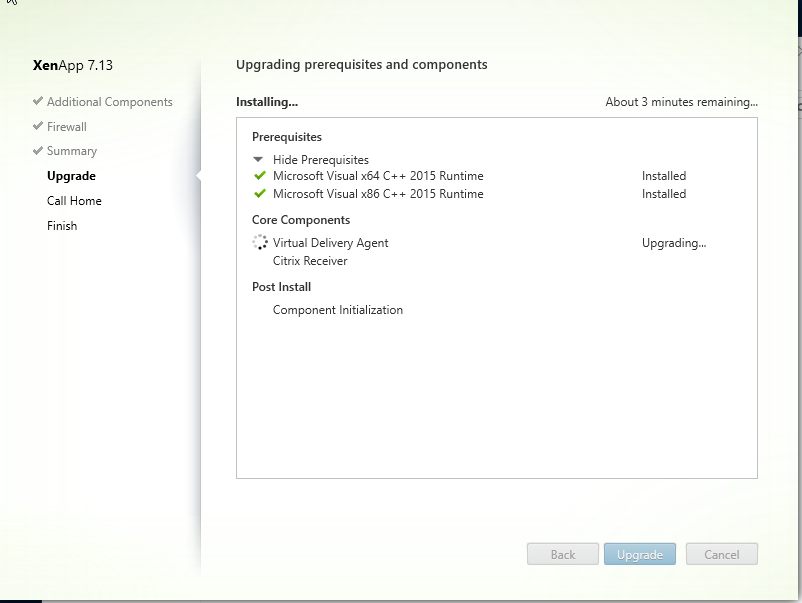
Step 7: At Call Home, Select i do not want to participate in Call Home

Step 8: After upgrade has finished. Click Finish
Step 9: Repeat this in all Master Images used in Site.
Delivery Controller Upgrade
Step 1: Download the Citrix 7.13 ISO from the Citrix Downloads (XenApp_and_XenDesktop_7_13.iso) and Click Upgrade Studio and Server Components

Step 2: Accept the terms and license agreement, click on Next
Step 3: At Ensure a Successful upgrade, tick I’m ready to continue , Click next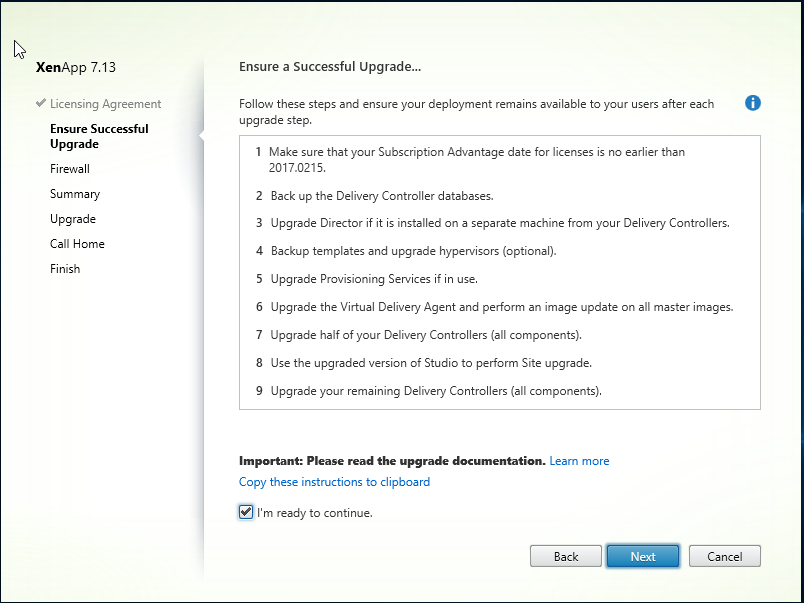
Step 4: Leave configuration at “Automatically”, Click Next
Step 5: At Summary screen, confirm everything is correct, Click Upgrade
Step 6: Prerequisites and Upgrades will now be installed.
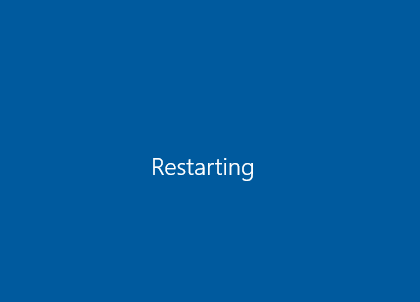
Step 7: The install will require a reboot, click Close and reboot will be initiated
Step 8: Server will be rebooted.
Step 9: Post Install upgrade will continue and Finish Successfully.

Step 10: Repeat this on exactly half of the delivery controllers on the site.
Step 11: Launch Citrix Studio, click Start the automatic Site upgrade

Step 12: Select, I am ready to upgrade. Click Upgrade
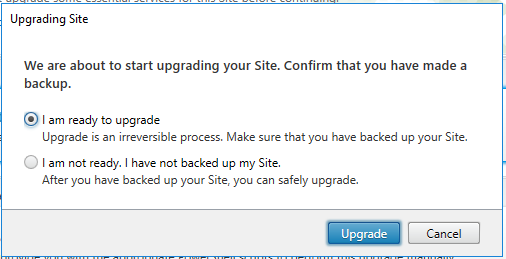
Step 13: Upgrade of Site/DB’s will begin and take a few minutes

Step 14: Site upgrade will show as complete when done.

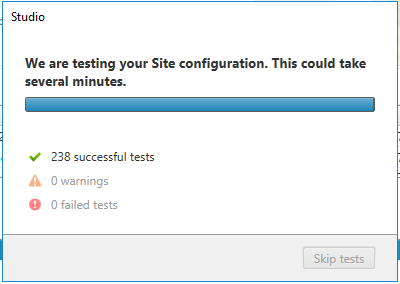
Step 4: In Citrix Studio\Common Tasks\Site – Perform Site Test and confirm all tests pass successfully.
Step 14: Repeat this the rest of the delivery controllers on the site.
THANK YOU!!!
Glad it helped!!