

Last Updated: 15/08/2016
NOTE: Port 80/8080 has been selected as different ports for the host headers, this is optional and the default port of 7751/7771 can be used.
See powershell script for installing (Step 1 to Step 15 )-Ivanti DesktopNow 10.x – Powershell Script silent Install
Installing First Server
Step 1: Download latest software from support.appsense.com. At time of writing it is 10.1 called (DesktopNow11Janurary2017.zip). Extract the zip file onto the Server.
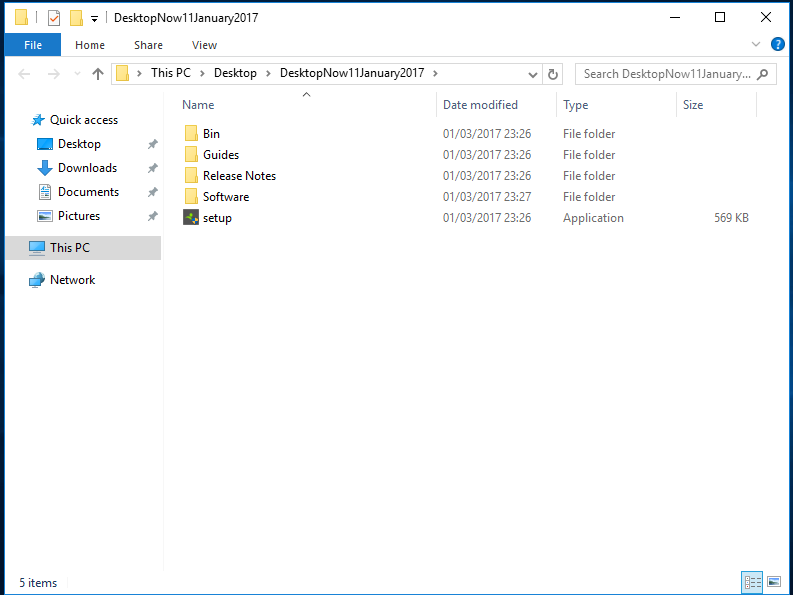
Step 2: Launch Setup.exe in the Extracted folder structure.
Step 3: Click next at the Welcome screen

Step 4: Tick i accept the terms in the license Agreement

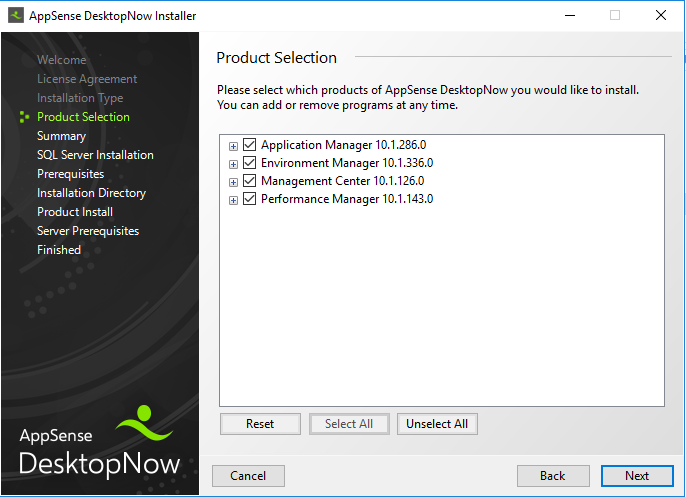
Step 5: At installation type, choose Advanced. Click next

Step 6: Leave as default, or Select All if not listed and click next
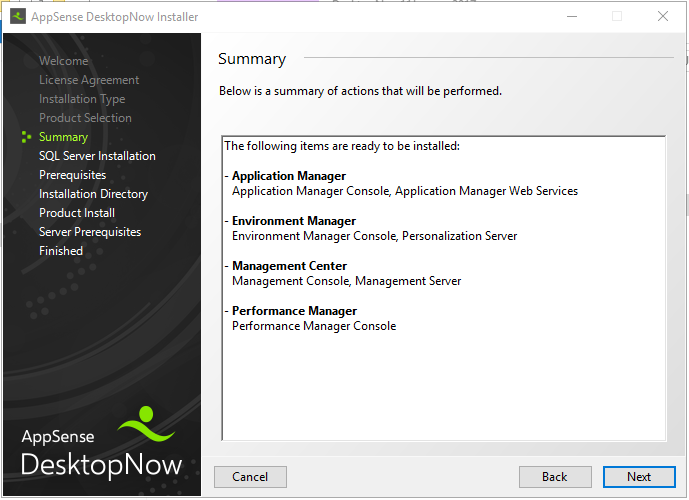
Step 7: Click next at Summary Screen after confirming details
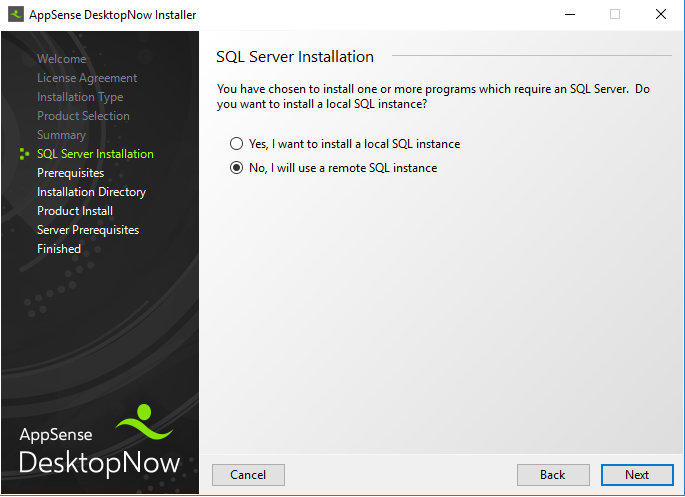
Step 8: Select No, I use a remote SQL instance. Click next
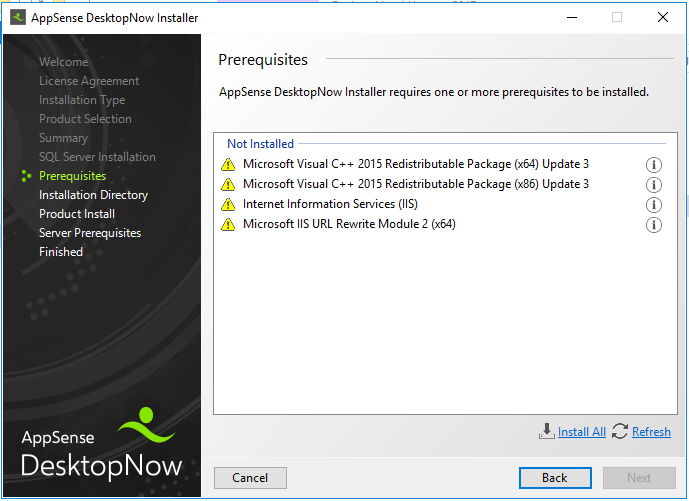
Step 9: At Prerequisites , choose Install All
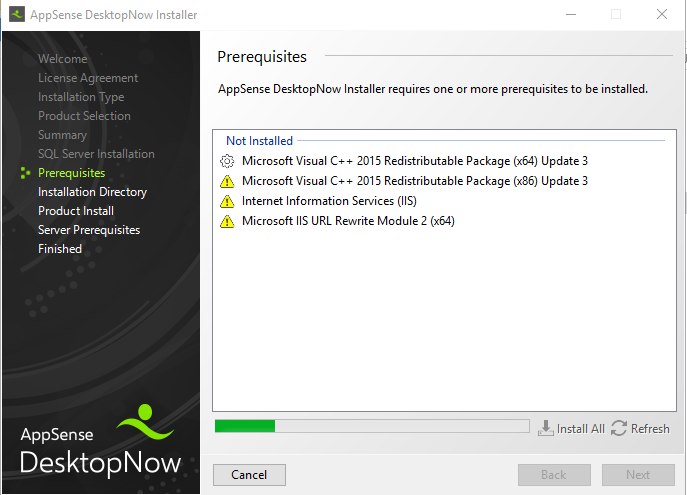
Step 10: Prerequisites will be installed and will take a few minutes to complete and will automatically move to the next screen
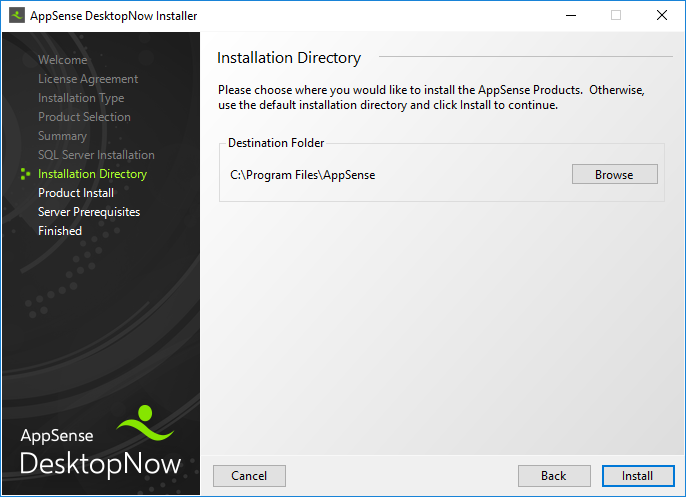
Step 11: Leave installation directory as default, click Install
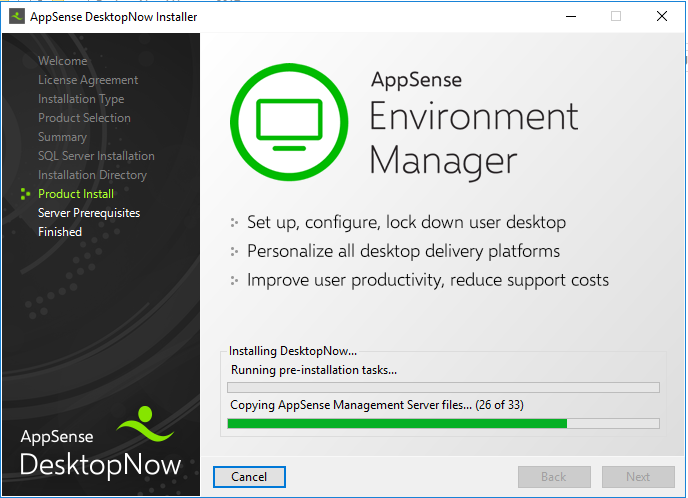
Step 12: Installation will commence and take around 5 minutes to complete
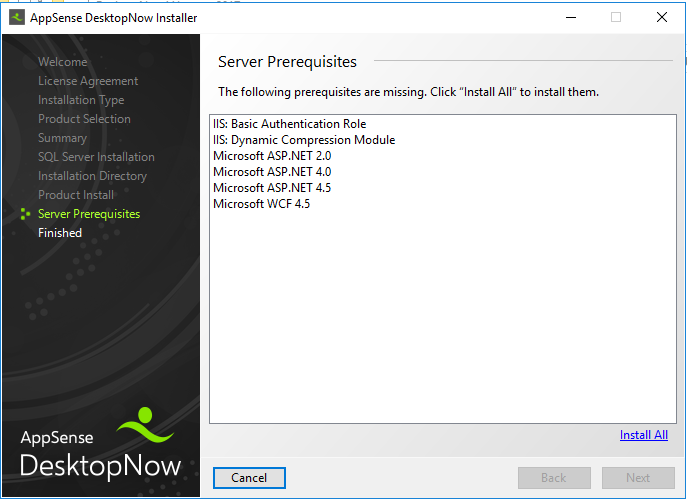
Step 13: After product installation has complete ,the server prerequisites need to be installed. Click Install All
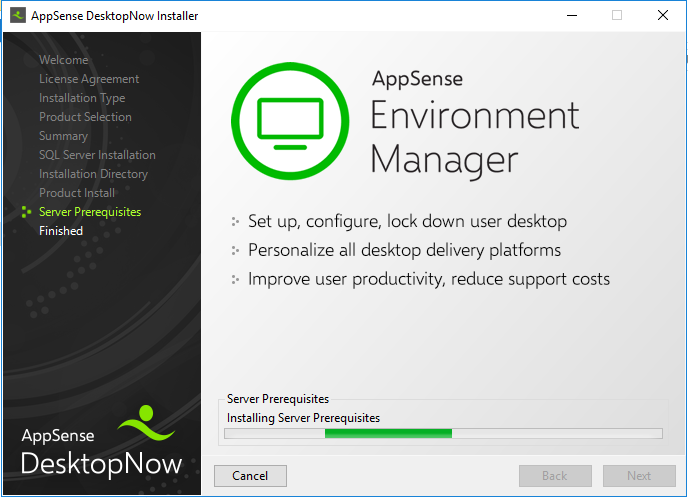
Step 14: Server Prerequisites will be installed and will take a few minutes to complete and will automatically move to the next screen
Step 15: Installation complete will be shown after successful installation. Click Finish

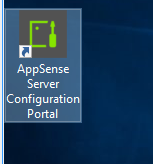
Step 16: Launch AppSense Server configuration Portal shortcut on the Desktop
Step 16: Enter the Domain\Username & Password of the user currently log in that has performed the installation. Click Submit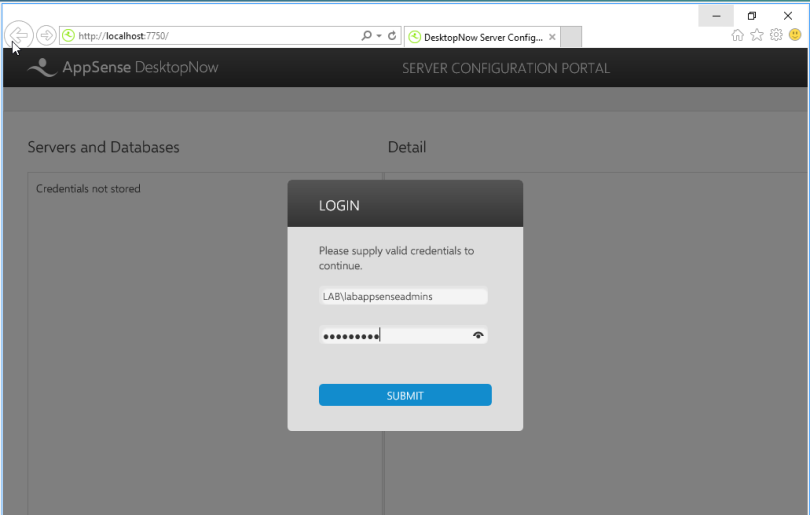
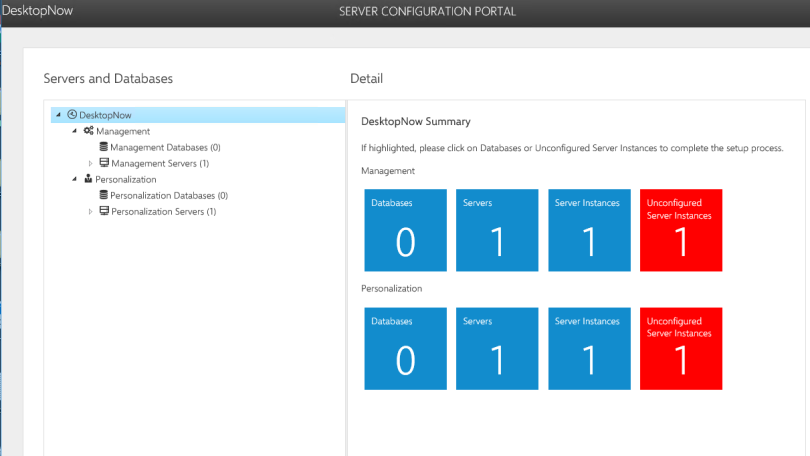
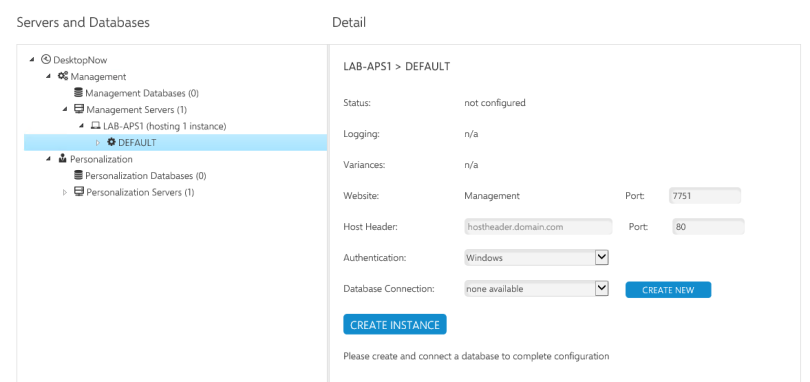
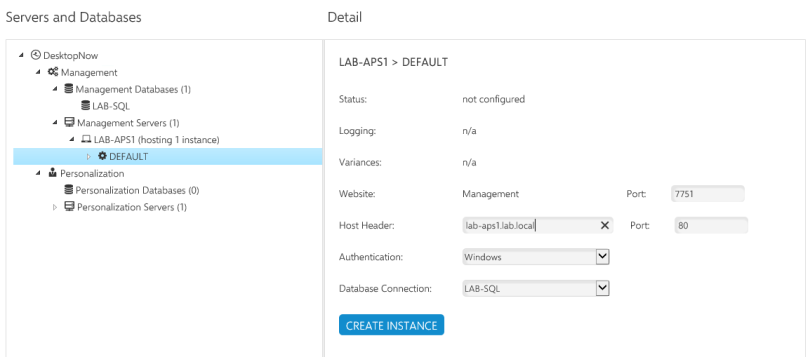
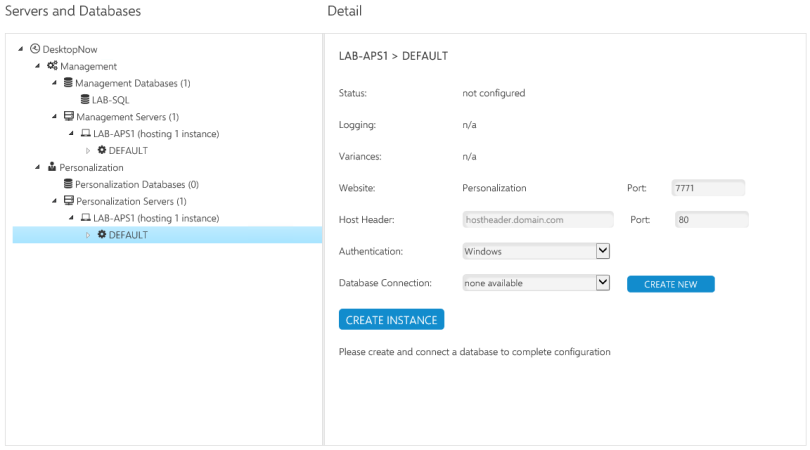
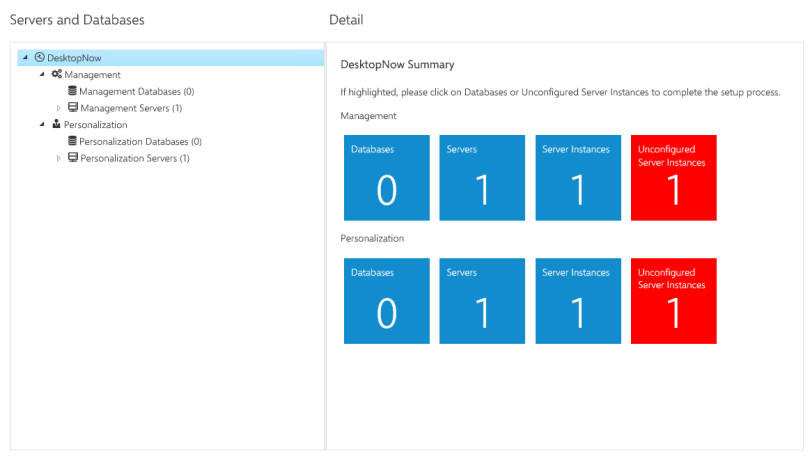
Step 17: Select the Unconfigured Server Instance under Management
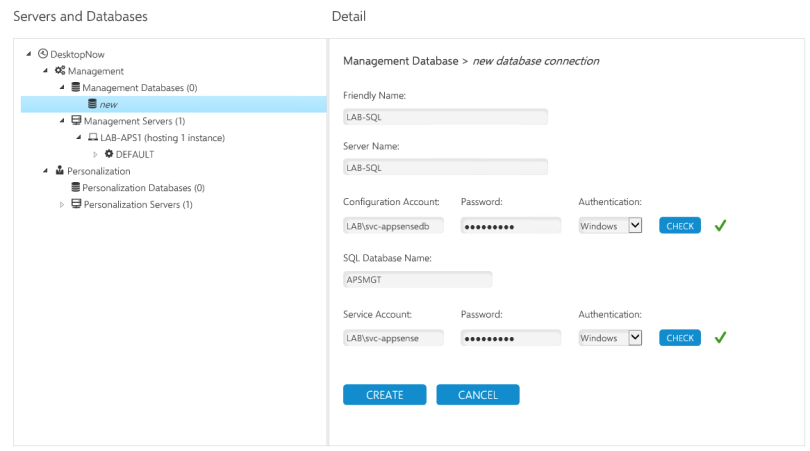
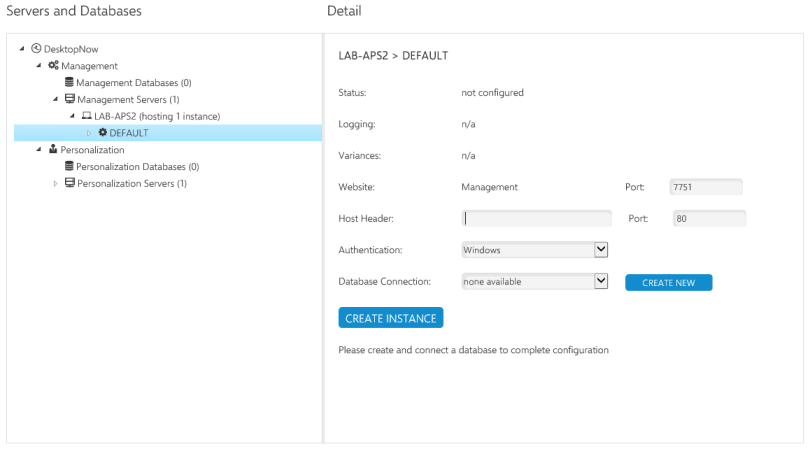
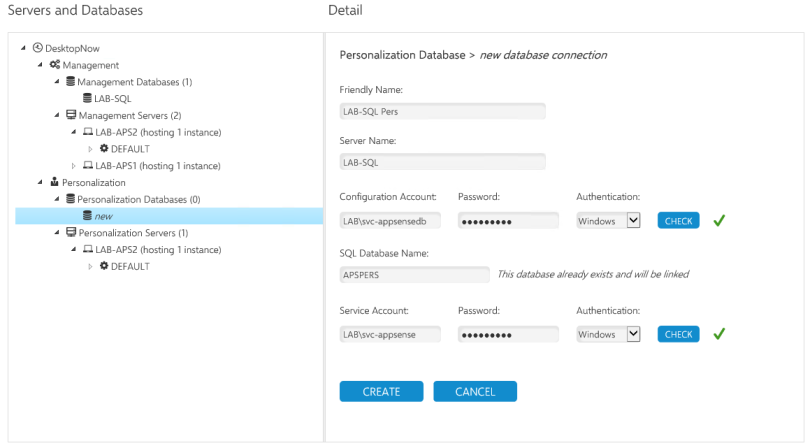
Step 18: Click Create New beside Database connection
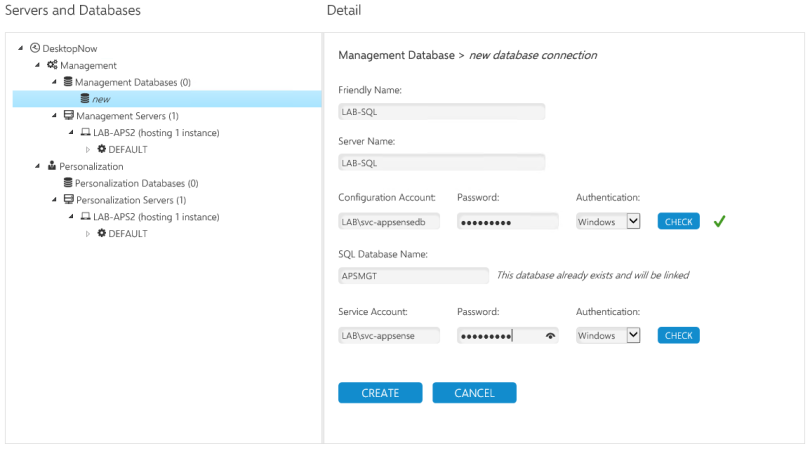
Step 19: Enter the following information, Click Create
- Friendly name: LAB-SQL
- Server Name: LAB-SQL
- Configuration Account: LAB\svc-appsensedb Authentication: Windows
- SQL Database Name: APSMGT
- Service Account: LAB\svc-appsense Authentication: Windows
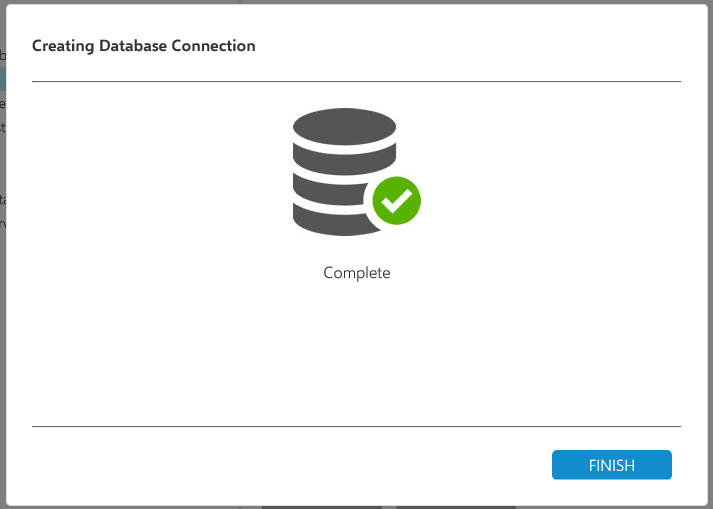
Step 20: Creating database connection will appear.please Wait
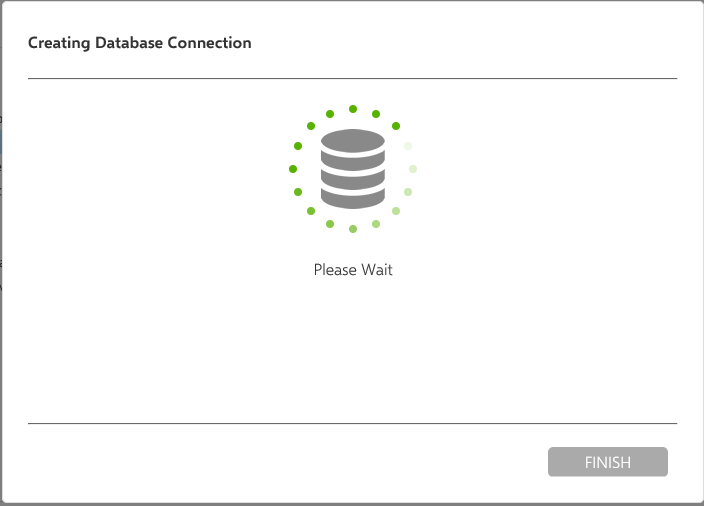
Step 21: Creating Database Connection Complete will show when complete. Click Finish

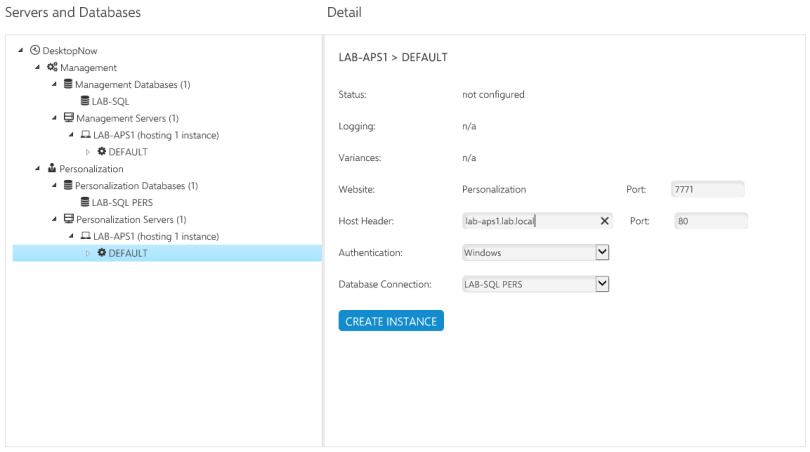
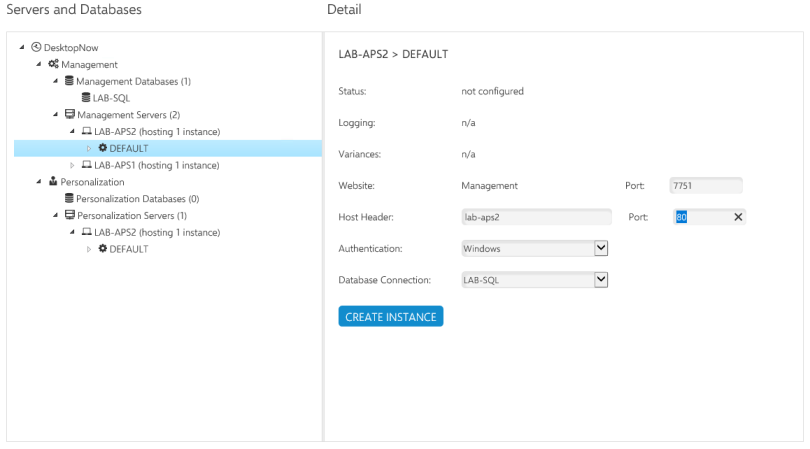
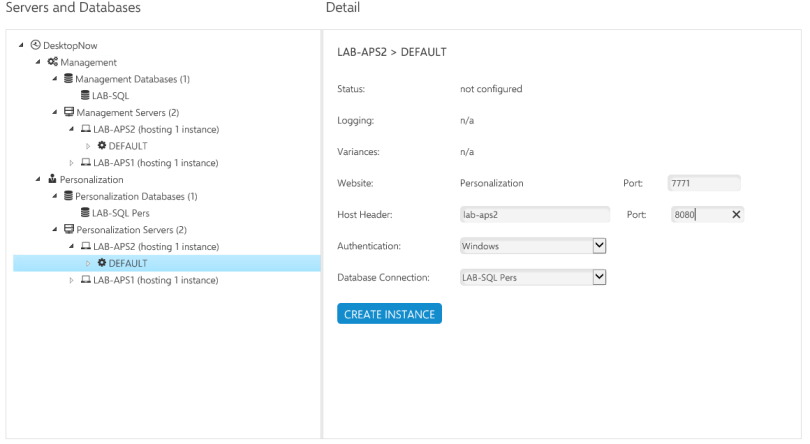
Step 22: Enter Host Header : Lab-aps1.lab.local. Click Create Instance
Step 23: Creating server instance will appear.please Wait
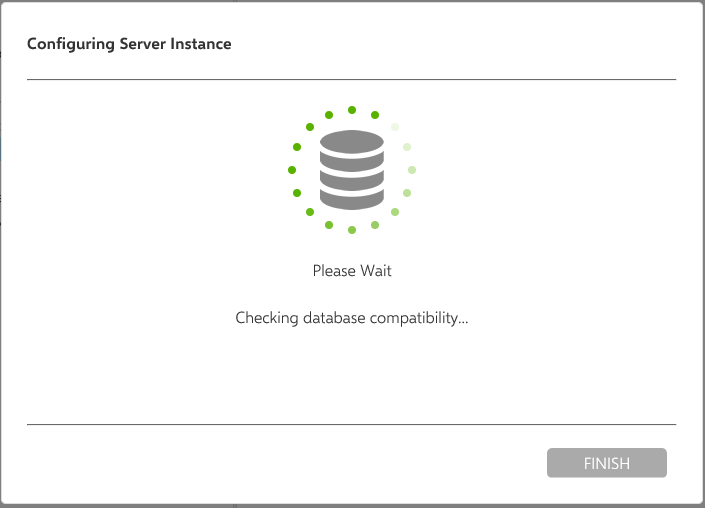
Step 24: Configuring Server Instance complete will show when complete. Click Finish

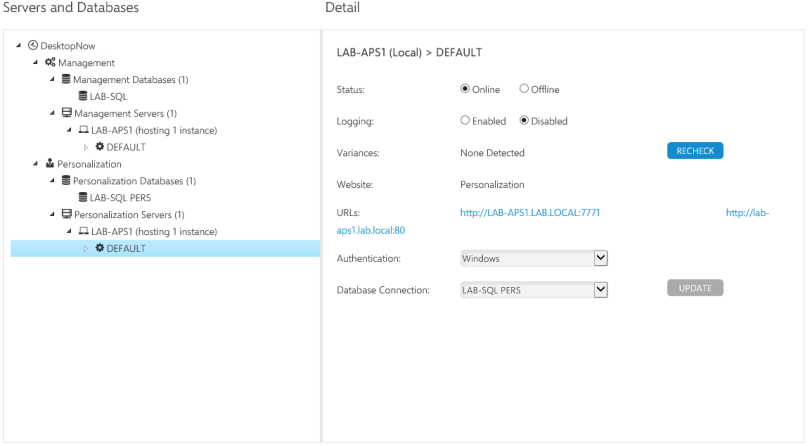
Step 25: Confirm no variances detected
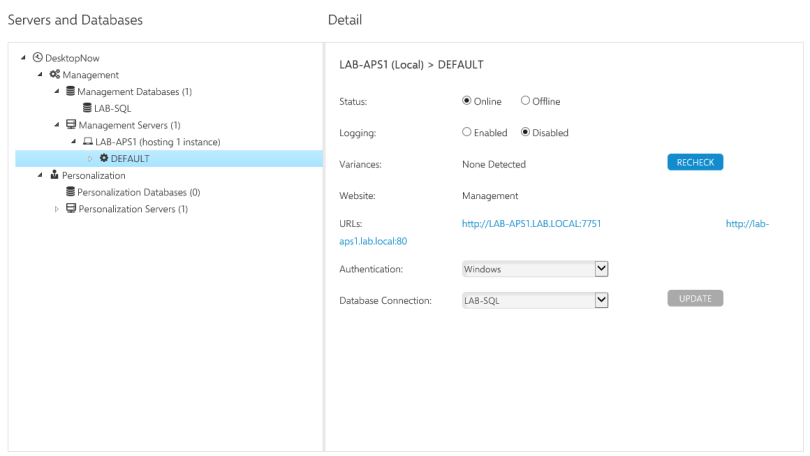
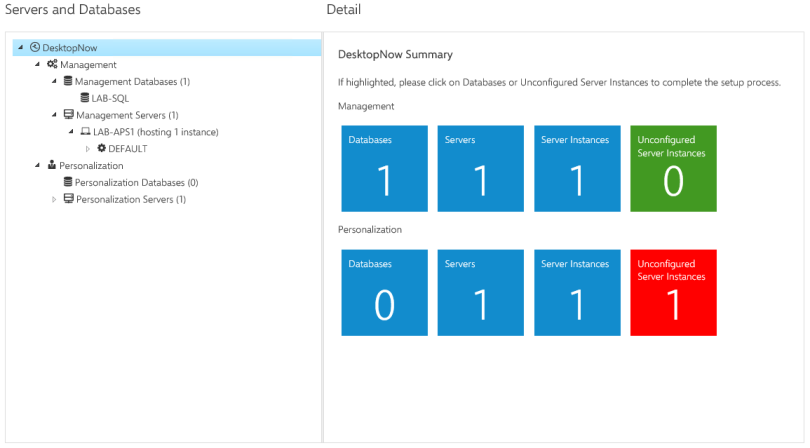
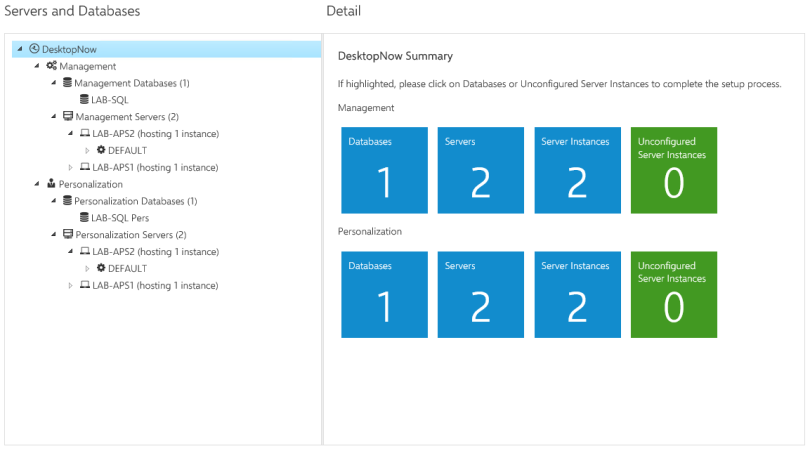
Step 26: Click DesktopNow and Unconfigured Server instance will now show as 0 and Green. Then Click Unconfigured Server instance under Personalizaion
Step 27: Click Create New beside Database connection
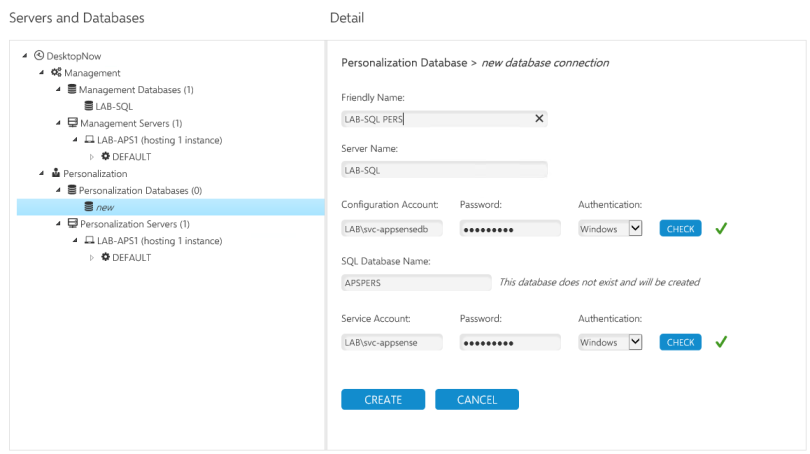
Step 28: Enter the following information, Click Create
- Friendly name: LAB-SQL PERS
- Server Name: LAB-SQL
- Configuration Account: LAB\svc-appsensedb Authentication: Windows
- SQL Database Name: APSMGT
- Service Account: LAB\svc-appsense Authentication: Windows
Step 29: Creating database connection will appear.please Wait

Step 30: Creating Database Connection Complete will show when complete. Click Finish
Step 31: Enter Host Header : Lab-aps1.lab.local. Click Create Instance
NOTE: If load Balancing Appsense, please do not complete this step Load Balancing AppSense Management and Personalization Servers 10.1 using Netscaler 11.x
Step 32: Creating server instance will appear.please Wait

Step 33: Configuring Server Instance complete will show when complete. Click Finish

Step 34: Confirm no variances detected
Step 35: Click DesktopNow and Unconfigured Server instance will now show as 0 and Green under Personalization

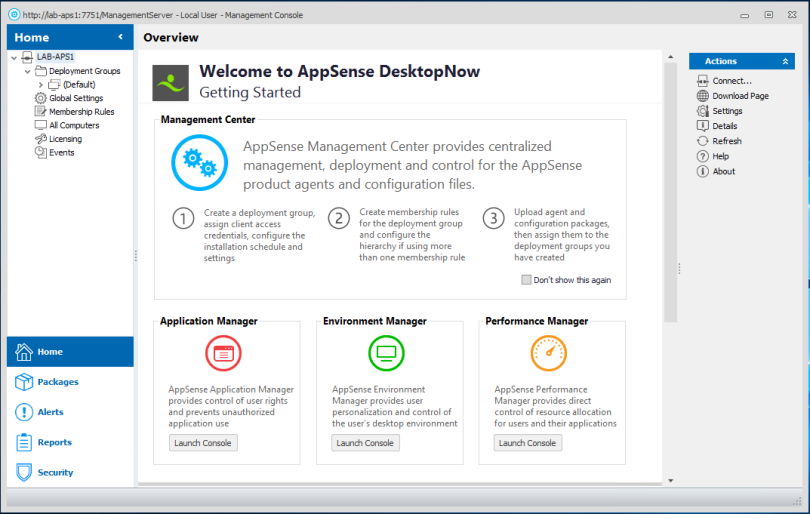
Step 36: Click Start – AppSense – AppSense Management Console
![]()
Step 37: AppSense Management Centre splashscreen will appear.
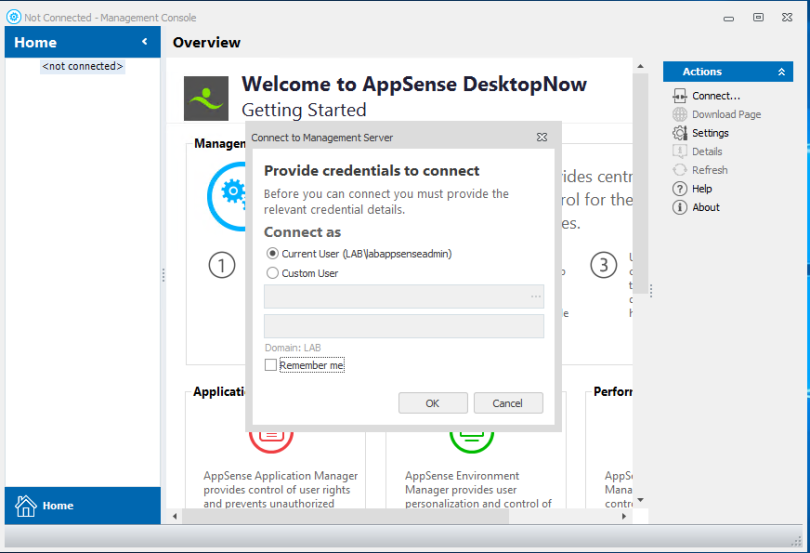
Step 38: AppSense management console will appear with Connect to Management Server credential window. Click Ok (leaving Current User as default)
Step 39: Confirm Management Console connects and menus are accessible. Then Select Launch Console under Environment Menu
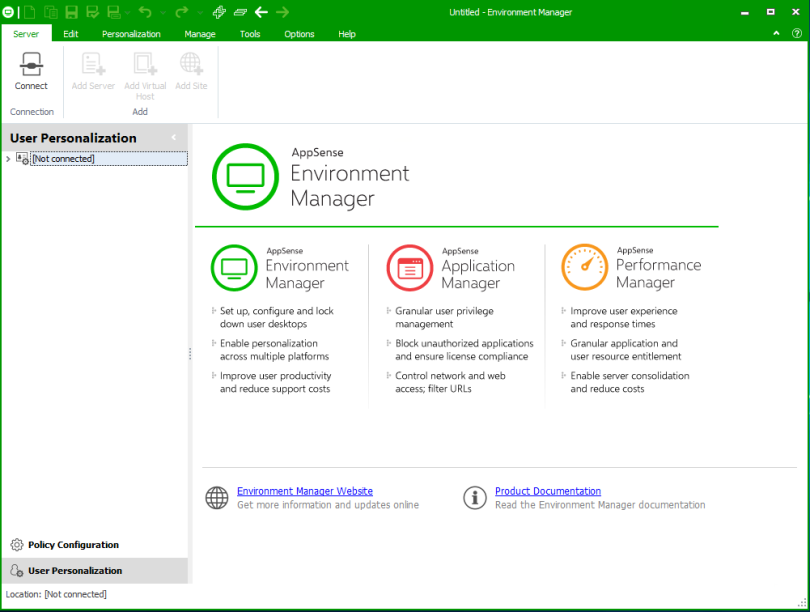
Step 40: AppSense Environment Manager splashscreen will appear.

Step 41: The environment management console will appear, click User Personalization

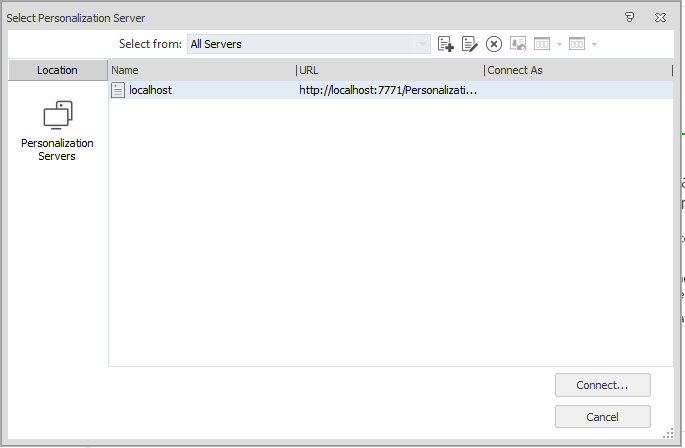
Step 42: Click Connect
Step 43: Click Connect again
Step 44: Confirm the Personalization Loads, verifying Server Version/DB Groups etc.
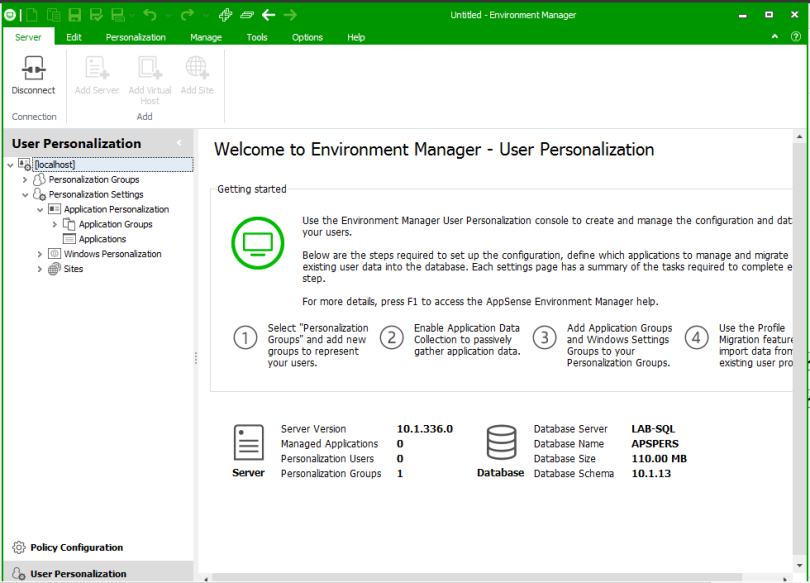
AppSense has now been installed and is ready to configure.
Adding Additional Servers
Step 1: After repeating Step 1 -15 on Installing First Server, click AppSense Server Configuration Portal icon on Desktop.
Step 2: Click Unconfigured Server Instance under management
Step 3: Click Create New beside Database connection
Step 4: Enter the following information, Click Create
- Friendly name: LAB-SQL
- Server Name: LAB-SQL
- Configuration Account: LAB\svc-appsensedb Authentication: Windows
- SQL Database Name: APSMGT
- Service Account: LAB\svc-appsense Authentication: Windows
Step 5: Creating database connection will appear.please Wait
Step 6: Creating Database Connection Complete will show when complete. Click Finish
Step 7: Enter Host Header : Lab-aps2.lab.local. Click Create Instance
Step 8: Creating server instance will appear.please Wait
Step 9: Configuring Server Instance complete will show when complete. Click Finish
Step 10: Click DesktopNow and Unconfigured Server instance will now show as 0 and Green. Then Click Unconfigured Server instance under Personalizaion

Step 11: Click Create New beside Database connection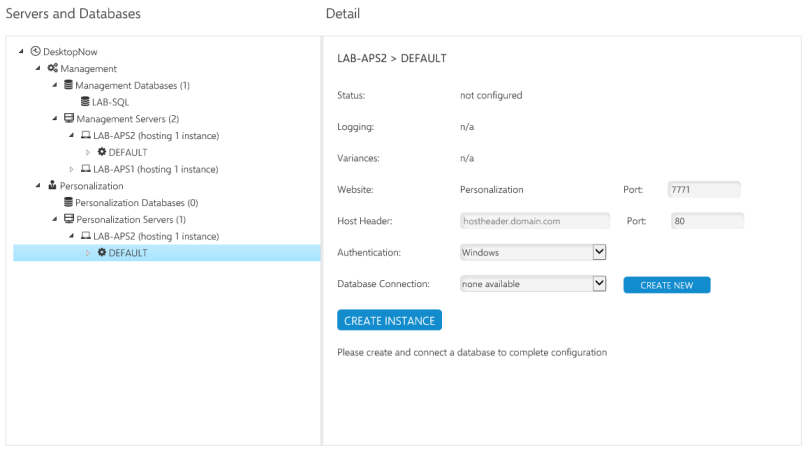
Step 12:Enter the following information, Click Create
- Friendly name: LAB-SQL PERS
- Server Name: LAB-SQL
- Configuration Account: LAB\svc-appsensedb Authentication: Windows
- SQL Database Name: APSMGT
- Service Account: LAB\svc-appsense Authentication: Windows
Step 13: Creating database connection will appear.please Wait
Step 14: Creating Database Connection Complete will show when complete. Click Finish
Step 15: Enter Host Header : Lab-aps2.lab.local. Click Create Instance
Step 16: Creating server instance will appear.please Wait
Step 17: Configuring Server Instance complete will show when complete. Click Finish
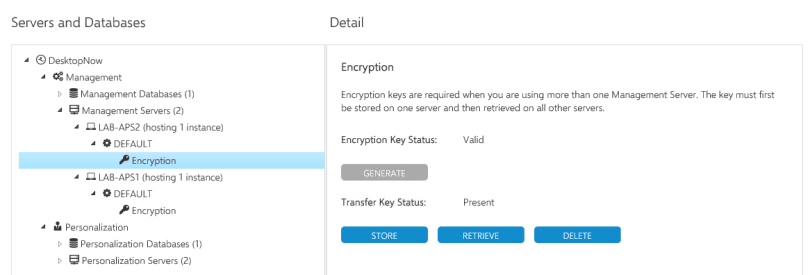
Step 18: Confirm Server = 2 for Management/Personalization and No Unconfigured Server Instances.
Step 19: Select LAB-APS1 and Expand Default\Encryption. Click Store
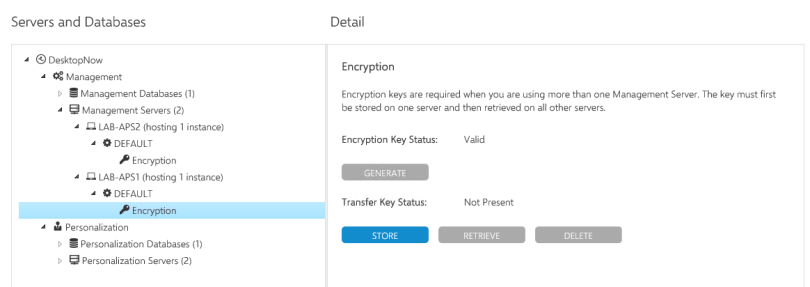
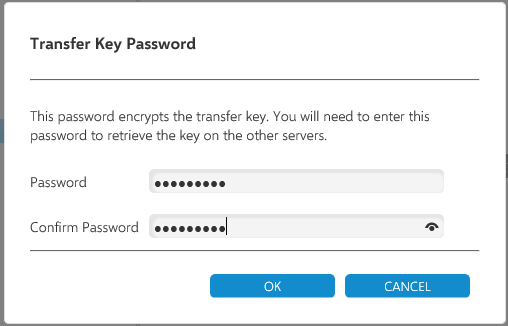
Step 20: Select Store and password to allow transfer to LAB-APS2
Step 21: Select LAB-APS2 and Expand Default\Encryption. Click Retrieve
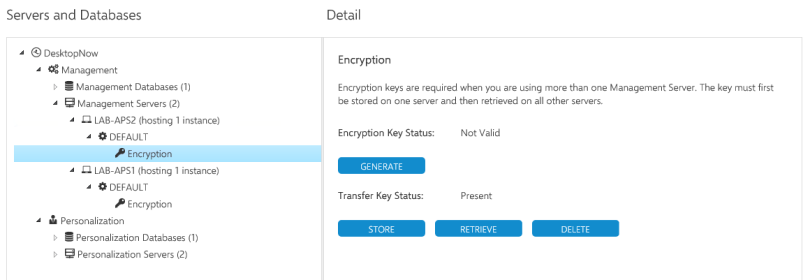
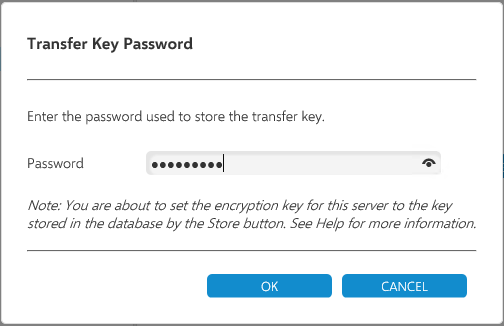
Step 22: Enter password entered in Step 20. Click OK
Step 23: Confirm encryption key status is Valid
Great post! Got a quick question though. Do all servers now act as both Personalization and Management Servers? Seems to come up as unconfigured if you don’t do it for both but in previous versions we have made a differentiation on server types?
Thanks again, your posts are so helpful!
Thanks Nicola. For the purpose of the post i have combined the two roles(management & personalization) but they roles can be separated into two different server which would be normal for scale-ability reasons. Like before you don’t have to configure the personalization and it can remain unconfigured etc.
Hope this help!
Perfect thanks! 🙂
I request you to provide a download link….I have registered in the site but there is no way to download appsense desknow……