

NOTE: Citrix now have a support article for enabling SSL found here. https://support.citrix.com/article/CTX221671 . It pretty much cover the exact content in below article.
By default the setup of a cloud connector will be set to allow non-SSL for incoming XML requests from (Citrix Gateway & Storefronts). Best practise for any deployments in recent years is to secure the traffic between components and cloud connector is no exception.
Before we start , the following is required to run through the steps successfully
Requirements:
- Certificate (Server Authentication, Client Authentication) generated by a 3rd party certificate or internal certificate authority
- Disable IPv6 on the Cloud Connectors
Enabling SSL on Cloud Connector to secure XML/STA Traffic
Step 1:- Install your SSL Certificate onto the Cloud Connectors, for my purpose i have enrolled the computer account into the certificate policy which generates the below certificate

Step 2:
The following command needs to be run on the cloud connectors to bind
netsh http add sslcert ipport=: certhash= appid={}
In order to run this command the following information will need to be obtained for it to run and bind successfully.
- <IP address>:<Port Number>
- <Certificate Hash Number>
- {<Citrix Broker Service GUID>}
IP Address
0.0.0.0 will bind all IP Address on the cloud connector
Port Number
SSL Port Number – This is by default usually port 443 , but can be customised to a different port number if required.
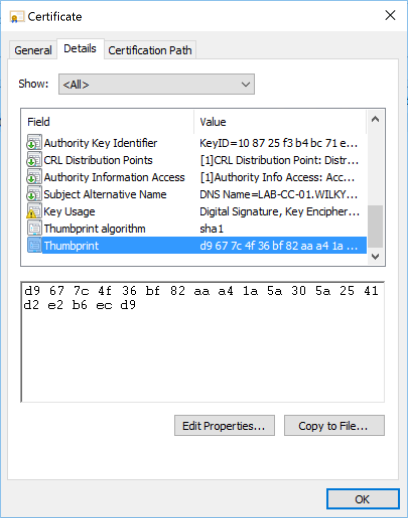
Cert Hash Number
The Certificate Hash Number can be located in the registry of the Cloud Connector. Open Registry Editor and locate the following key name and find the server certificate which you want to use for the binding:
HKEY_LOCAL_MACHINE\SOFTWARE\Microsoft \SystemCertificates\MY\Certificates
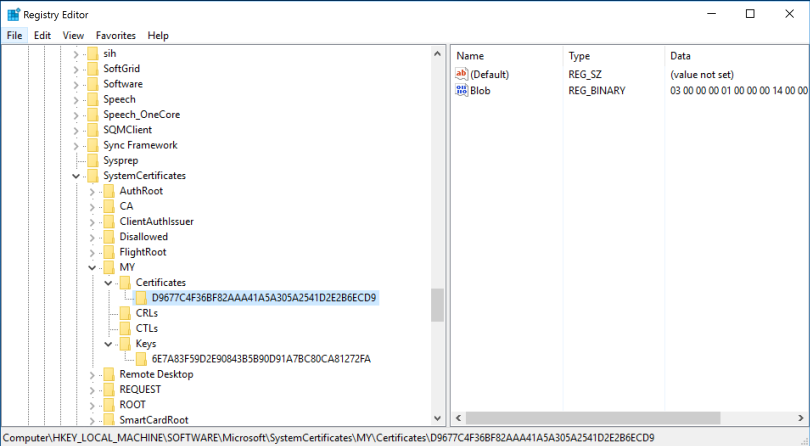
or via the Thumbprint field in the details tab on the certificate file.
AppID
To get the GUID of the Citrix Broker Service open Registry Editor and select Find. Search for Citrix Broker Service which must return a result in the default location at HKEY_CLASSES_ROOT\Installer\Products\.
The GUID is the key name.
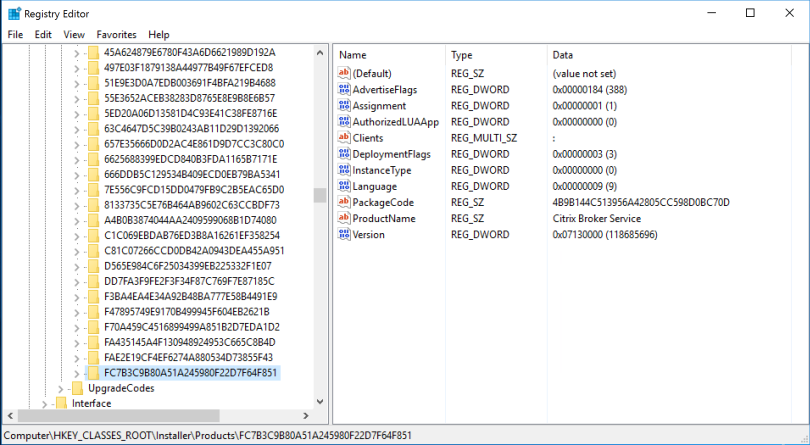
For the appid you need to include the dashes (-) for the parameter ,otherwise, the command cannot run successfully. The GUID should be formatted as follows as {Eight-four-four-four-tweleve}
In my case it is : FC7B3C9B-80A5-1A24-5980-F22D7F64F851
Now that you have all the details , the following is the command i have constructed from the information above and will be required for next step:-
netsh http add sslcert ipport=0.0.0.0:443 certhash=D9677C4F36BF82AAA41A5A305A2541D2E2B6ECD9 appid={FC7B3C9B-80A5-1A24-5980-F22D7F64F851}
Step 3:Open Command Prompt (Run as Administrator) and paste the command from Step 2 and Hit Enter.
![]()
Step 4: After the command run, confirm SSL cert is successfully added or review the command again from step 2 to ensure no error are in command.

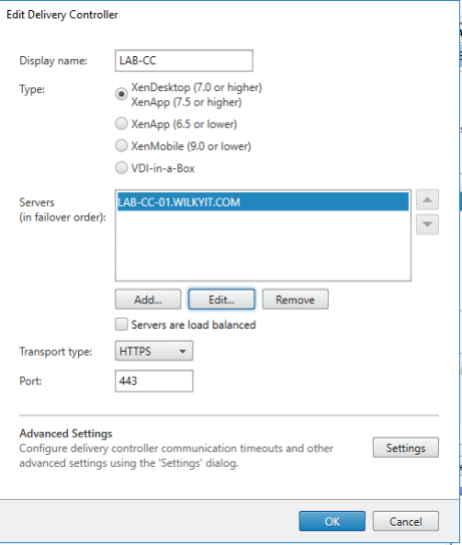
Step 5: Now it’s time to change the storefront delivery controller transport type.
- Open Citrix Studio, Click your Store, Click Manage Delivery Controllers ->Edit the appropriate delivery controller which has the cloud connector’s listed.
- Under Transport Type, Change to HTTPS and ensure Port 443 is used
NOTE: The name in the certificate has to match the name added in servers list.
Step 6: (Optional) only required if Gateway Service is on-premises. Now Changing your Citrix Gateway,
- Login into your Citric ADC, Click Netscaler Gateway, Open the Virtual machine providing the External Gateway
- Under Published Application, Click STA Server and change the location to https based (in my case https://lab-cc-01.wilkyit.com
- Confirm the State is UP
NOTE: The name in the certificate has to the entry added here

Step 6: Ensure you disable the existing non-secure HTTP (Port 80). To disable this port browse the registry to the following location
- HKEY_LOCAL_MACHINE\SOFTWARE\Citrix\DesktopServer
- XMLServicesEnableNonSSL=0
- DWORD: 0
Reboot the Cloud connector for this to take effect.
Testing Cloud Connector
Step 1: Log into External Citrix Gateway or Storefront (on-premises)
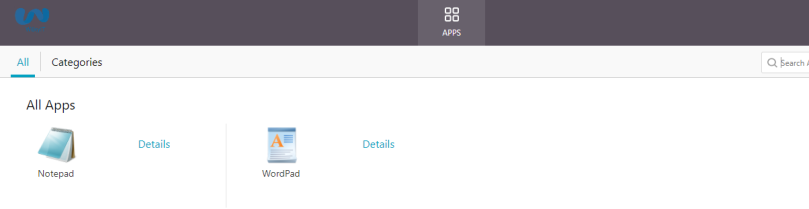
Step 2: Confirm Application enumeration is successful.
Hope this has been helpful, any comments/feedback please don’t hesitate to drop me a mail/comment below this article.
You can also get the Cert hash easily via PowerShell
Get-ChildItem -Path Cert:\LocalMachine\my | Select-Object FriendlyName, Thumbprint, Subject, NotBefore, NotAfter
Great guide!
You can also get the appid with the following command line:
Get-Wmiobject -Class Win32_Product |Select-String -Pattern “citrix broker service”