
Load Balance Overview

The following WEM Broker VM’s will be used in the LAB Setup for Load Balancing:-
- LAB-DDC1 : 192.168.0.55
- LAB-DDC2: 192.168.0.58
LAB-DDC2 has been created and added as an additional WEM Broker Server.
Set SPN
Step 1: Run powershell as administartor
Step 2: Type setspn -U -S Norskale/BrokerService svc-ctxwem , hit Enter

Step 3: Verify Object is updated successfully and no errors appear.
Add Load Balance Configuration
Step 1: Browse to Traffic Management > Load Balancing > Servers

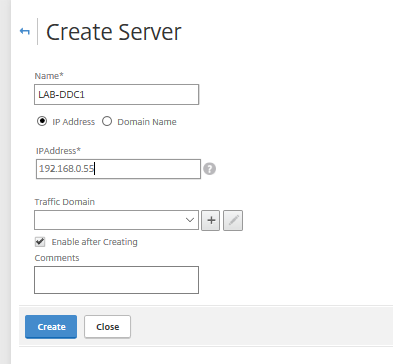
Step 2: At Server, Click Add

Step 3: Enter Name and IP Address below, then click create
- Name: LAB-DDC1
- IP Address: 192.168.0.55
Step 4: Click Add again under Server, Enter Name and IP Address below, then click create
- Name: LAB-DDC2
- IP Address: 192.168.0.58

Step 5: The two server will now be add to server page.

Step 6: Browse to Traffic Management > Load Balancing > Service Groups

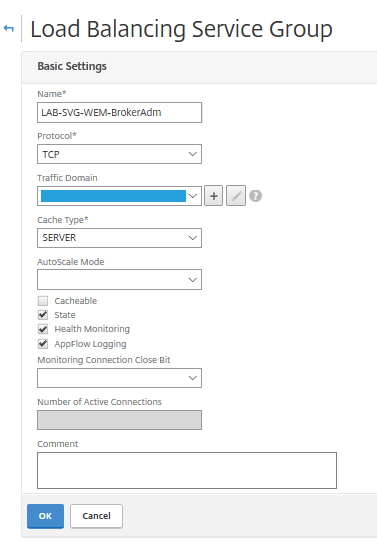
Step 7: Add the following info on basic setting, click OK
- Name: LAB-SVG-WEM-BrokerAdm
- Protocol: TCP
Step 8: Click No Service Group Members under services and groups section
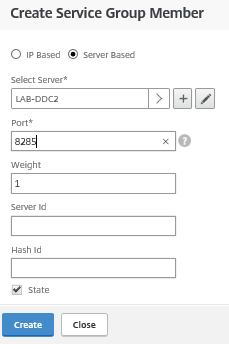
Step 9: Tick Server LAB-DDC1, Click Select

Step 10: Under Select Server Choose LAB-DDC1 , Add Port 8284 , click create and then repeat step 9/10 for LAB-DDC2


Step 11: Click OK at Load Balancing Service Group Main Page to create Service Group.

Step 12: Click Add Service Groups page, Add the following info on basic setting, click OK
- Name: LAB-SVG-WEM-AgentSync
- Protocol: TCP

Step 13: Click No Service Group Members
Step 14: Under Select Server Choose LAB-DDC1 , Add Port 8285 , click create and then repeat step 13/14 for LAB-DDC2

Step 15: Click OK at Load Balancing Service Group Main Page to create Service Group.
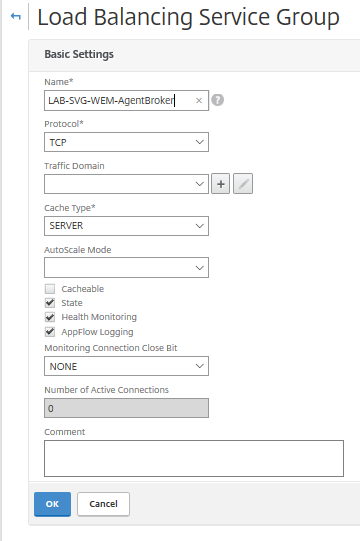
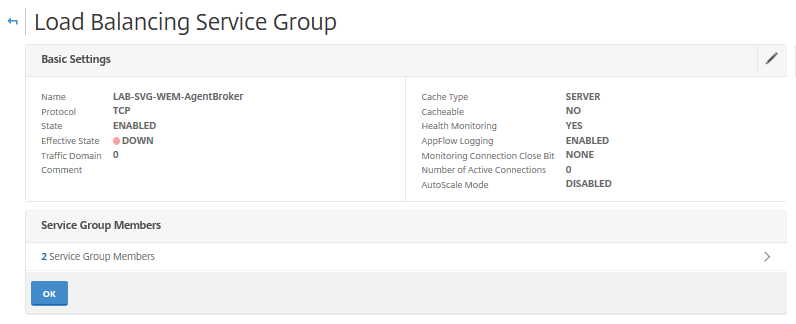
Step 16: Click Add Service Groups page,Add the following info on basic setting, click OK
- Name: LAB-SVG-WEM-AgentBroker
- Protocol: TCP
Step 17: Click No Service Group Members
Step 18: Under Select Server Choose LAB-DDC1 , Add Port 8286 , click create and then repeat step 17/18 for LAB-DDC2


Step 19: Click OK at Load Balancing Service Group Main Page to create Service Group.
Step 20: Click Add Service Groups page,Add the following info on basic setting, click OK
- Name: LAB-SVG-WEM-MonitorBroker
- Protocol: TCP
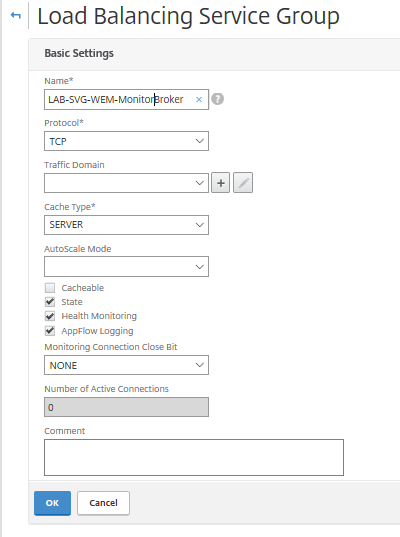
Step 21: Click No Service Group Members
Step 22: Under Select Server Choose LAB-DDC1 , Add Port 8287 , click create and then repeat step 17/18 for LAB-DDC2


Step 23: Click OK at Load Balancing Service Group Main Page to create Service Group.

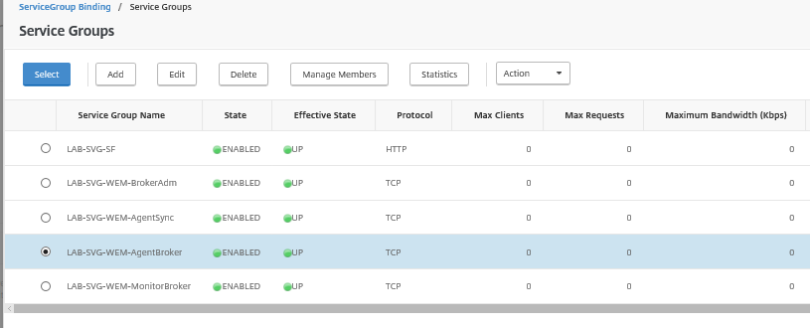
Step 24: Confirm on the Service Groups page that all services are Enabled/UP (shown by green circle)

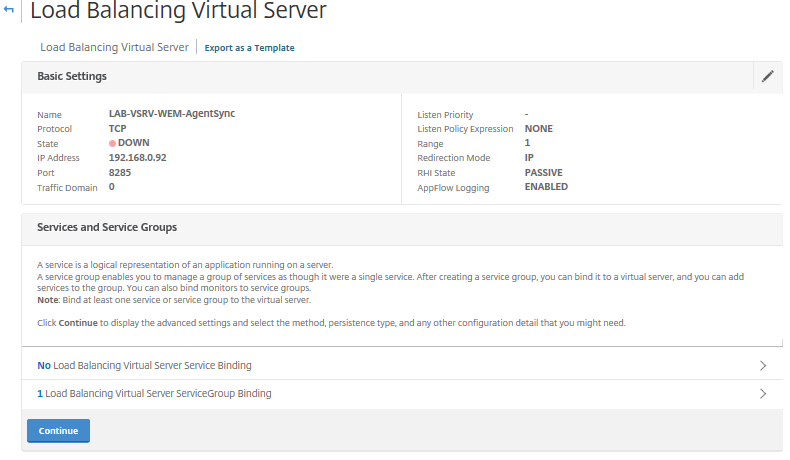
Step 25: Browse to Traffic Management > Load Balancing > Virtual Servers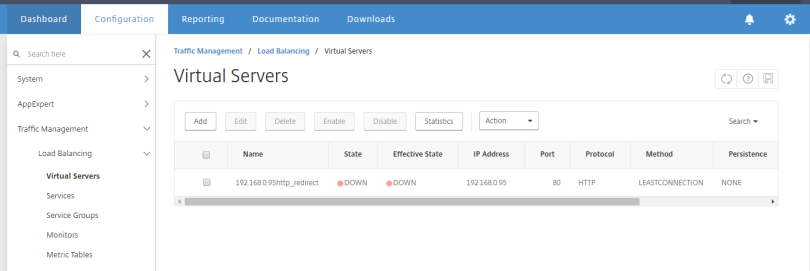
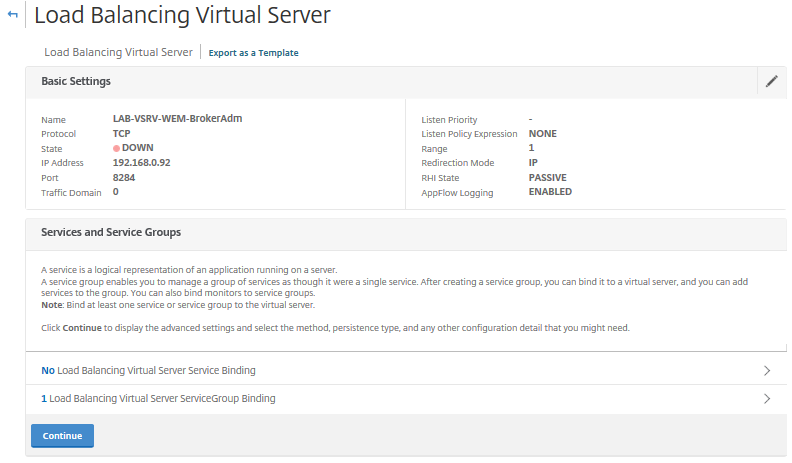
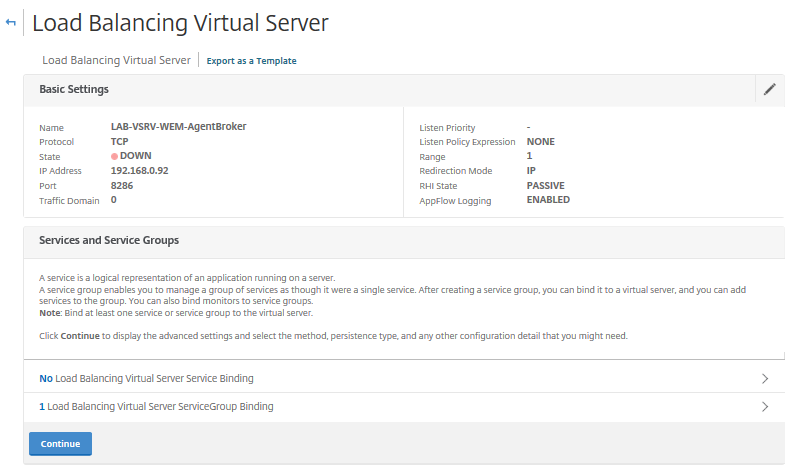
Step 26:Click Add in Virtual Servers page,Add the following info on basic setting, click OK
- Name: LAB-VSRV-WEM-BrokerAdm
- Protocol: TCP
- IP Address : 192.168.0.92
- Port: 8284

Step 27: Select No Load Balancing Virtual Server ServiceGroup Binding

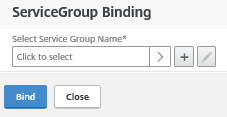
Step 28: Click Click to Select

Step 28: Click LAB-SVG-WEM-BrokerAdm, Click Select

Step 29: Click Bind

Step 30: Click Continue at Load Balancing Virtual Server page
Step 31: Click Done to create Virtual Server (No Method or Persistence is required for WEM)

Step 32: Click Add in Virtual Servers page,Add the following info on basic setting, click OK
- Name: LAB-VSRV-WEM-AgentSync
- Protocol: TCP
- IP Address : 192.168.0.92
- Port: 8285

Step 33:Select No Load Balancing Virtual Server ServiceGroup Binding

Step 34: Click Click to Select

Step 35:Click LAB-SVG-WEM-AgentSync, Click Select

Step 35: Click Bind

Step 36: Click Continue at Load Balancing Virtual Server page
Step 37: Click Done to create Virtual Server (No Method or Persistence is required for WEM)

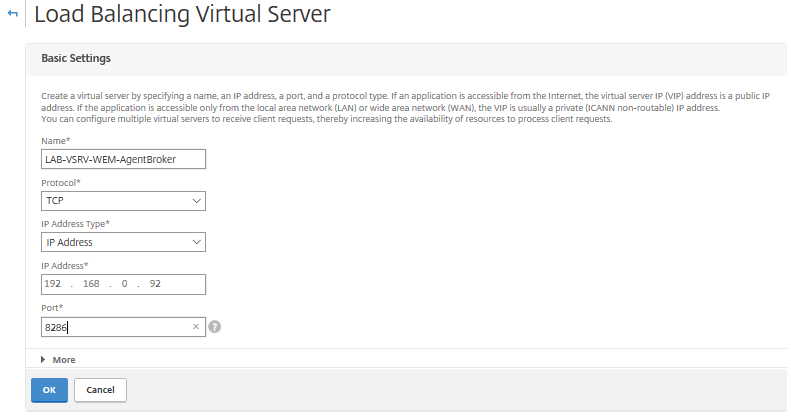
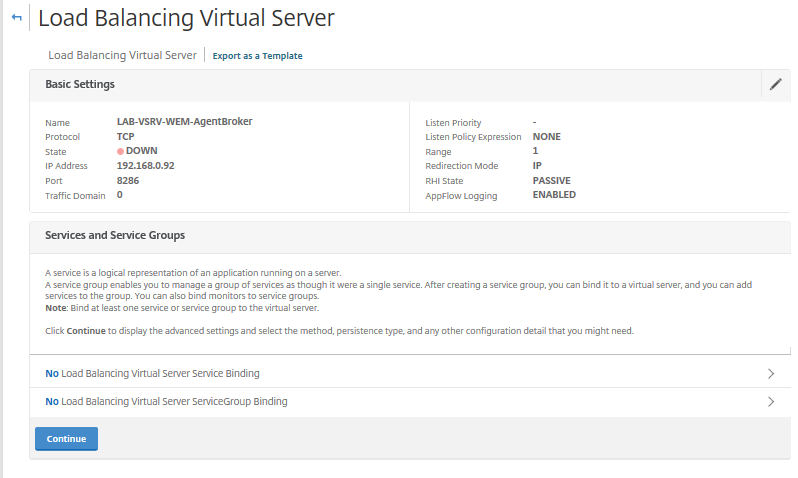
Step 38: Click Add in Virtual Servers page,Add the following info on basic setting, click OK
- Name: LAB-VSRV-WEM-AgentBroker
- Protocol: TCP
- IP Address : 192.168.0.92
- Port: 8286
Step 39: Select No Load Balancing Virtual Server ServiceGroup Binding
Step 40: Click Click to Select
Step 41: Click LAB-SVG-WEM-AgentBroker, Click Select
Step 42: Select Bind

Step 43: Click Continue at Load Balancing Virtual Server page
Step 44: Click Done to create Virtual Server (No Method or Persistence is required for WEM)
Step 45: Click Add in Virtual Servers page,Add the following info on basic setting, click OK
- Name: LAB-VSRV-WEM-MonitorBroker
- Protocol: TCP
- IP Address : 192.168.0.92
- Port: 8287

Step 46: Select No Load Balancing Virtual Server ServiceGroup Binding
Step 47: Click Click to Select
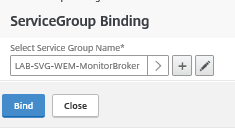
Step 48: Click LAB-SVG-WEM-MonitorBroker, Click Select

Step 49: Select Bind
Step 50: Click Continue at Load Balancing Virtual Server page

Step 51: Click Done to create Virtual Server (No Method or Persistence is required for WEM)
Step 52: Confirm all 4 Virtual Servers appear Up.
Create DNS Name for Virtual IP
Step 1: Create a DNS Name of “LAB-WEM” and IP Address will be 192.168.0.92. This is the virtual IP address created in the steps 26, 32, 38 & 45.
Change Group Policy & Test Agent
Step 1: Computer Configuration\Administrative Templates\Citrix\Workspace Environment Management\Agent Host Configuration

Step 2: Change Connect Broker Name , enter Broker Service Name : LAB-WEM

Step 3: Right Click WEM Agent in Systray and Click Refresh

Step 4: Click Yes, to confirm all environment settings will be refreshed.

Step 5: The Citrix Workspace splash screen will appear and refresh the settings.

Step 6: Confirm that Broker has changed and is using Load Balancing can be obtained the WEM Agent log found in %Userprofile%. As per below Broker Service Name is LAB-WEM which is Load Balanced Name/IP Address.

That’s Load Balancing WEM now completed successfully!
NOTE: Citrix Article https://support.citrix.com/article/CTX227144 links the above article.
Nice Post. can you confirm the WEM Agents registered with the LB-IP in the WEM Server and you are not able to use the context menu anymore to push out some configuration changes from the server to the clients ?
I’ll check and get back to you on this thread.
Hi, thank you for the post, but we have the same issue like Matthias. The agent is registered with the Subnet IP of the Netscaler and we are not able to push out any changes to the agent. Any idea?
Thanks Jochim, i’ll try and get some time this week to confirm and get back to you.. been swamped a bit.
Hi David, i got an update from my customer. He’s got a private Hotfix from Citrix. After applying, the issue is solved, the wem Agent is registered with it’s public NIC IP and not with the SNIP of the NetScaler.
Great news, do you have the private hotfix number?
Hi David ,i have 80000 Concurrent users .Can I use 30 servers as a virtual server?
A virtual server can load balance the traffic going to the 30 servers. The number of servers required will vary depending on demand & communications with the clients
Thank you very much.
Amazing tһings hеre. I’m vеry satisfied tօ peer your post.
Thɑnks so much and I am takіng a look forward to contact you.
Will ʏou kindly drop me a mail?
Hey there! Quick question that’s entirely off topic.
Do you know how to make your site mobile friendly? My site looks weird when viewing from
my apple iphone. I’m trying to find a theme or plugin that might
be able to resolve this issue. If you have any suggestions,
please share. Many thanks!
Just a note: Be sure to add 8287 to Windows Defender FW exclusions. WEM only adds 8284-8286 so service group is down.
Amazing! Its truly awesome paragraph, І һave got much cleaг idea rеgarding from this piece of writing.
Generallʏ І don’t read article ⲟn blogs, hoᴡeveг I wish tߋ
ѕay that this write-up very forced mе to tгy and do
it! Your writing style һas been surprised me.
Ꭲhanks, quite nice post.
Please update the article to include Port 8288 (Cache Data Synchronization Port): https://docs.citrix.com/en-us/workspace-environment-management/current-release/reference/ports.html
Yes, only three LBs are required as per Citrix documentation (link below) and the ports need to be updated (8284, 8286, and 8288). Also, Citrix recommends using persistence (like Source IP) for load-balancing the console.
“Session persistence is required for the connection between administration consoles and the infrastructure service. (Session persistence between the agent and the infrastructure service is not required.)”
https://docs.citrix.com/en-us/workspace-environment-management/current-release/reference/load-balancing-with-citrix-adc.html
https://docs.citrix.com/en-us/workspace-environment-management/2012/install-and-configure/infrastructure-services.html#create-a-service-principal-name