
Installation on First PVS server
1 -Click on Server Installation.

2 -The setup wizard will automatically detect the required pre-requisites and will prompt to install them. Click on “Install”

3 – All the pre-requisites will install.

4 – Click on “Next” on the welcome screen.

5 – Accept the license agreement and click on “Next”.

6 – Enter the username and organisation name. Select the all users option and click on “Next”.

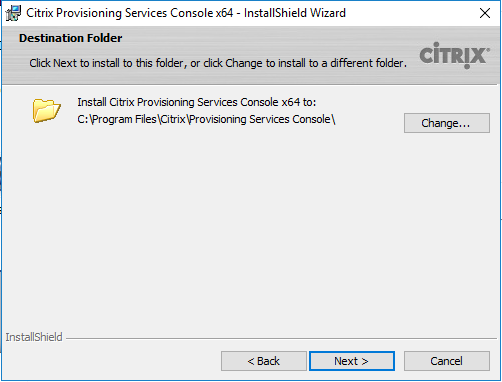
7 – Choose the installation folder. Leave Default. Then click on “Next”

8 – At Ready to Install the program , Click on “Install”

9 -Click on “Finish” to complete the installation.

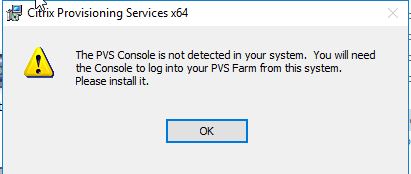
10 – You will get a warning message about the PVS Console. Click “OK”
11 – Provisioning Services Configuration Wizard will automatically start. Click on “Next”.

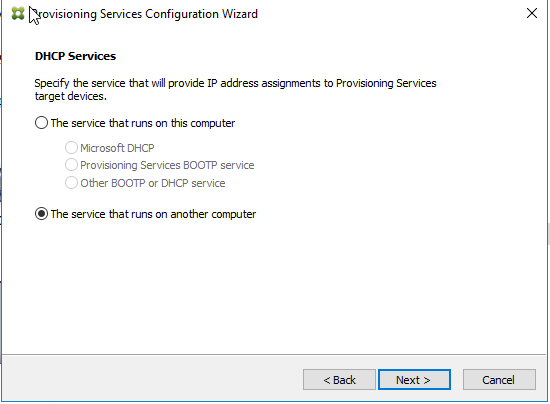
12 – On DHCP Services, DHCP option. Choose” The service that runs on this computer”. Click on Next.
13 – Choose the PXE options. “This Service that Run on this Computer – Provisioning Services PXE Service”

14 – Choose Create farm and click on “Next”.

15 – The wizard will create the database now. Enter the SQL fqdn and click on “Next”.

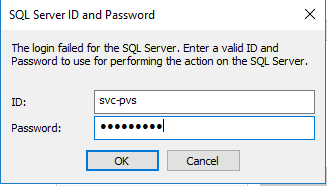
16 – Enter the DB Account used for creating the Database on the SQL Server Instance
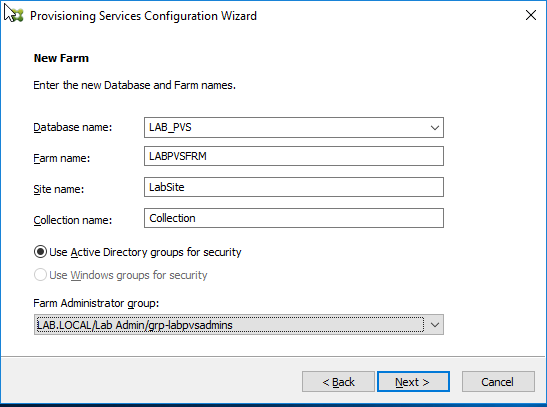
17 – Enter the database name., Enter the Farm Name, Enter the Site Name. Enter the Collection Name, Specify Farm Administrator Group. Click on Next to Create the Farm
18 – Select the destination path to store the vdisks. Give a store name and click on “Next”.

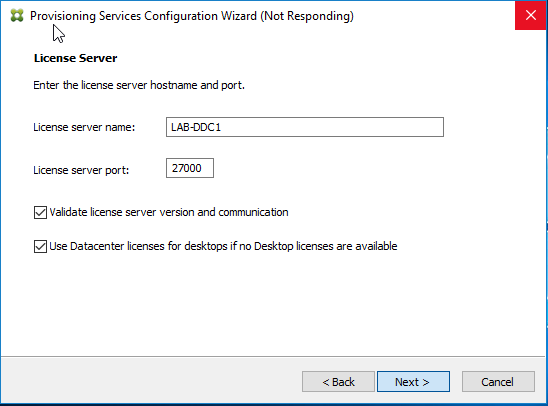
19 – Enter the license server fqdn. Click on Next.
20 – This will be used to run the Stream and Soap service. Enter Network Service Account or specify a Service account to run the PVS/Soap Service.

21 – Leave all as default, click “Next”

22 – Check the network communication settings for management and streaming. Select the correct interface, check with your network admin in case this is not clear. Click “Next”

23 – Tick Use the Provisioning Services TFTP Service , Leave all as default click on “Next”.

24 -Confirm Stream Server Boot List, at this point since this is the first only 1 server IP Address will be listed

25 – Leave as default as Linux Images will not be streamed.

26 – Enter MyCitrix Credentials, this is optional.

27 – Click on “Finish” on configuration settings page.

28 – A Windows Firewall message will appear if Firewall is on. Click OK.
29 –Installation will progress, with status of each service during installation.

30 – Click on Done after the configuration wizard has finished.

31 – In order to manage Citrix Provisioning Services you need to install the console. Run the setup from the Citrix Provisioning Services ISO and this time click on “Console Installation”.

32 – The installation will extract

33 – Click Next in the welcome screen.

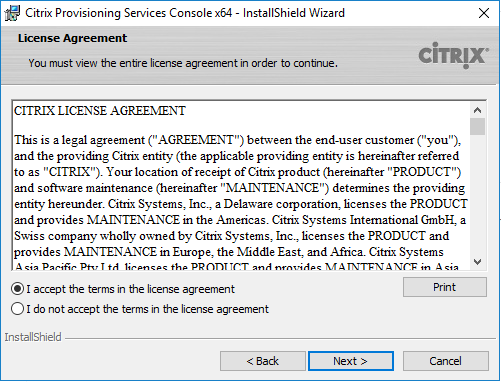
34 -Accept the License Agreement and click on “Next”.
35 – Enter the Customer Information and click on “Next”.

36 – Enter the Customer Information and click on “Next”.
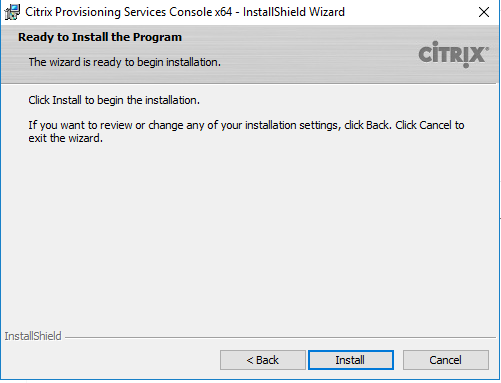
37 – Click on “Install” to begin the installation.
38 – After the installation is finished, click on “Finish”.

39 – Click Finish to Complete Installation

Second Provisioning Server
40 – Repeat Step 1 – 13. Click “Join Existing Farm”

41 – Enter the FQDN of the SQL Server and Instance Name, Click “Next”

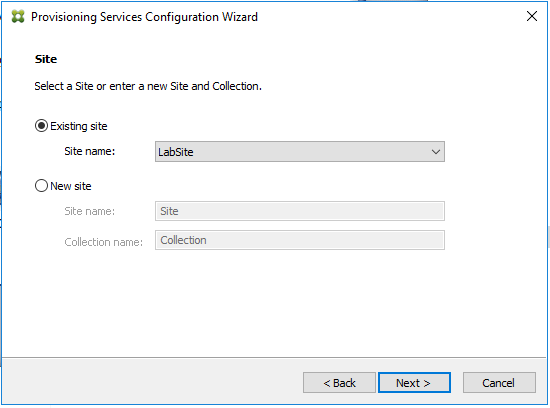
42 -Select the correct farm. Click “Next”

43 – Select an “Existing Site” – Choose “LabSite”
44 -Choose “Existing Store”, Select “PVS Store”

45- Repeat Steps 18 – 30 to Complete Second Provisioning Server
Next
Citrix PVS 7.13 – Part 2: Create and Test PVS Image – Windows Server 2016
Citrix PVS 7.13 – Part 3: Deploying PVS Images and assigning to Machine Catalog
2 comments